Monday, August 24, 2020

SNOW FOLKS by Crafty Crusader ~ Deanne Crim

 "Snow Folk" Diorama Jars

Paper-mâché  Up-cycled Bottles


If you are like me, you hate to throw anything away that might serve as craft supplies for a future, as of yet, unrealized project. I cannot tell you how many bottles and jars I have stashed away (hoarded) simply because their shape was just too inspiring to dump into the trash can or recycle bin. 

There are many things that can be made with jars and bottles, most of which you can conjure in your mind...a vase...a lantern...a stash jar, etc. But what happens when you want to create something of 'heirloom' quality...a piece of heARTwork that can be appreciated for many years to come? 

That is where my Snow Folk Families landed...in my Sweet Spot!! I can't remember what inspired me to make them, originally. I think it might have been a Snow Globe craft for kids, creating small dioramas inside of canning jars. Whatever it was, I am grateful for the notion, because these have become one of my favorite crafts of all time, especially for gifting my beloveds! 

My original blog post on this craft was thorough and hit all the main points needed to make your own...but POOF! it disappeared. Well, it didn't really 'poof' disappear, I had to change my blog location several years ago, and somehow, that particular post didn't make it over here to the new location. {{Insert whining and moaning here!}}

So here we go with a re-do that will hopefully get us all where we need to be, right?!! 

Note: I am searching high and low for the photos that accompany this tutorial...so far, POOF?!! So I may have to reshoot the photo tutorial...Gahhh! But I will post these instructions in the meantime, so you can get your holiday crafting started. I will upload photos as soon as I find them, or take new ones.


SUPPLIES

• Juice Bottles, Glass Jars, Tabasco® Sauce Mini Bottles, Glass Receptacles, & Spice Jars, with openings large enough to fit diorama elements, faux pearls, acrylic snowflakes, etc.
• E6000 Adhesive (my favorite for all things!) for embellishments
• Tacky Craft Glue - for various attachments
• Paper Mache Clay (the same stuff you used as a kid) - shredded gray paper particles that you add water to, for a thick goopy medium. I purchase mine from Michael's craft store (with a coupon, of course!) 
• Aluminum Foil (wadded ball) - core of head to reduce cracking of paper mache clay, and to speed up drying time.  
• Acrylic Paint (cream or off-white) - to paint Snow Folk heads
• Acrylic Paint (orange) - to paint nose, if necessary
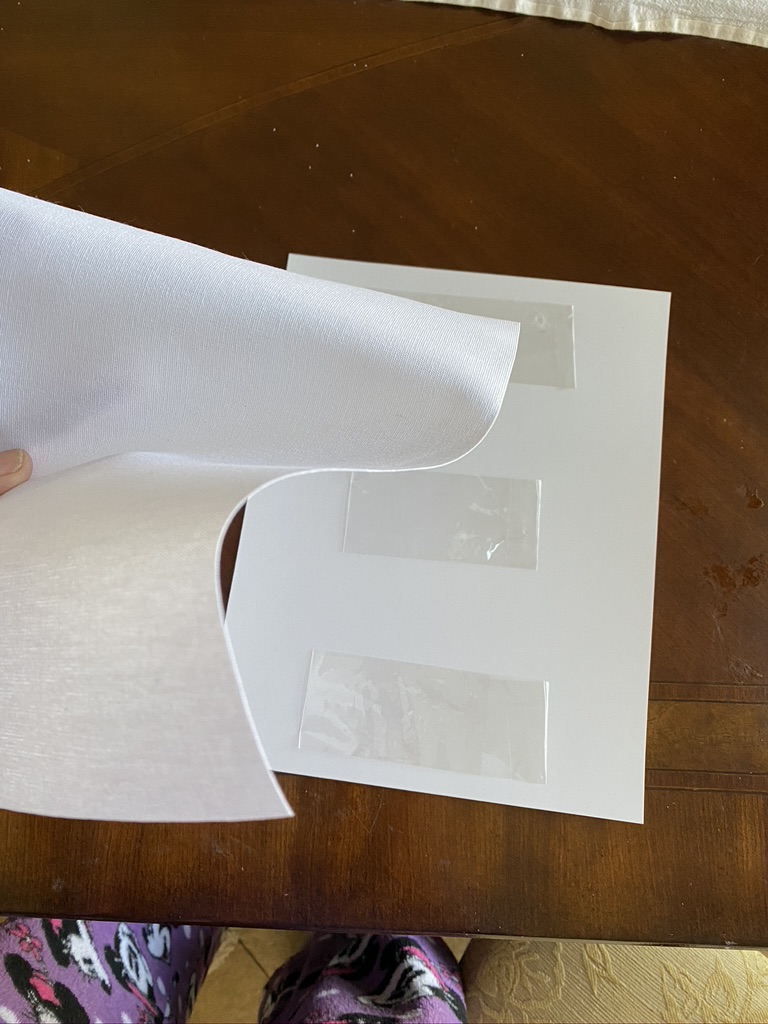
• Muslin Cloth - for wrapping upper body and/or neck scarf
• Acrylic 'Texture Medium' - to coat muslin cloth with texture and also act as adhesive for glitter dust 'snow' particles.
 Metal Paper Brads (black) - for 'mouth' 
• Large (flat-backed) Rhinestones OR Buttons - for eyes
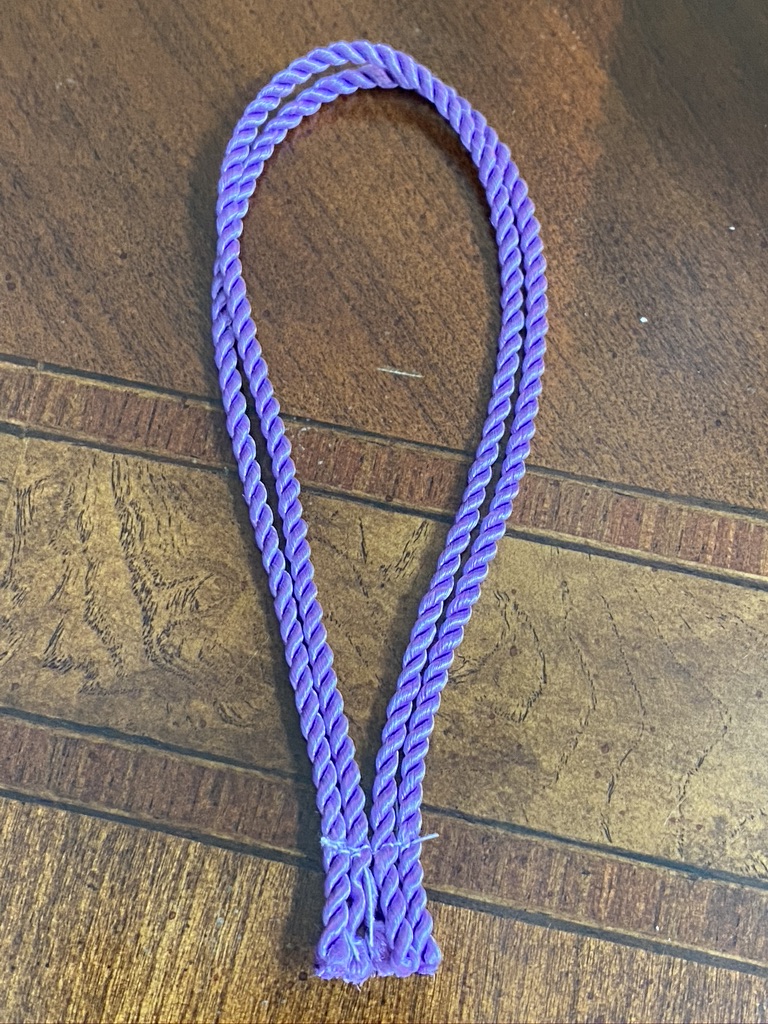
• Various Frilly Yarns, Trims, Tinsel Cord, Lace, Jute, etc. for wrapping neck, bottle base, or anywhere you want extra flash.
Embellishments: Small Ornaments, Crystal Beads, Flowers, Perfume Bottle Caps, Charms, Small Toys, Jewelry, Old Brooches, Kitchen tools, and ANYTHING that looks unique and interesting to create visual intrigue and curiosity to your Snow Folks. 
Diorama Elements: Acrylic Snowflakes, Faux Pearls, Miniature Forest Animals, Santa figures, Tiny Figurines, Toys, Mini Bristle Brush Trees, Toys, Holiday Figures, etc.
• (Optional) Floral Sprays or Elegant Crystal Sprays - for 'arms'
• (Optional) Faux Pearl Beads, Snowflake Shapes, Vase Filler, etc.
• (Optional) Miniature Figurines - Children, Deer, Trees, Toys, etc.
• (Optional) Small piece of polymer clay (orange) - nose 
• (Optional) Small pieces of polymer clay (black) - mouth 'coal' bits

TOOLS

• Paintbrushes - for applying Paint & Texture Medium. (no need for detail painting, a cheap brush is good)
• Scissors, as needed for fabric/neck scarf/muslin 
• Wire Cutters, as needed to trim floral spray wires
• Long Tweezers - to insert and adjust diorama elements
• Large craft OR disposable bowl - for mixing paper mache
• Protective Gloves - for hands mixing paper mache, and sculpting.


 DIRECTIONS

1. Choose your glass bottle or jar. Canning Jars are excellent choices for detailed dioramas. Wide mouth opening makes it easy to assemble. Small neck bottles are good for filling with faux pearls, glitter, snowflakes, acrylic 'ice cubes', etc. If using a bottle/jar with a label, soak first in soapy hot water to clean the interior and remove any odors, plus it will assist in peeling off the labels. The longer you soak, the easier it is to remove the label. A blow dryer can also be of assistance when removing old labels.

2. Head: If making a large Snow Folk, first create a wadded ball of aluminum foil for the core of the head, because if you use too big of a ball of paper mache material, it will take forever to dry, and most likely it will crack and make you want to cry. So be sure to use an aluminum ball core for the large heads. Snow Folk heads 2 inches in diameter or less, do not need an aluminum foil core.

3. Mix paper mache clay according to package directions. Note: Using warm water will yield the best results for a uniform mixture. You don't want it too wet and 'soupy', you want a good thick sticky mass that will shape into a nice round ball.

4. Cover your aluminum foil core with at least 3/4" to 1-inch thick layer of paper mache clay, shaping it into a nice round shape. For my large Snow Folk, I sculpt a small round mound, (which is later painted orange) to indicate the idea of a 'carrot' without being too literal. I have also used polymer clay 'carrot' shapes for the big guys, but they can easily break off if they are bumped the wrong way, so I opt for a shaped nose in paper mache for the big ones. 

5. If you are choosing Metal Paper Brads for the mouth (and eyes on smaller heads), insert them while the paper mache clay is still wet, for best adhesion. *If you plan to use polymer clay for the mouth 'coal' pieces or eyes, shape them in a size complimentary to the size of your head...roll irregular shape 'coal' pieces and cure in your home oven according to package directions. 


When the polymer clay pieces are cured and cooled, press them into the paper mache head to make an indentation while the paper mache is still moist and pliable, then set aside to glue them onto the head after the head is fully dried. The paper mache is not sticky enough to ensure that the pieces will adhere without glue, so this step will protect your finished artwork. 

6. I like to use large black faux rhinestones or buttons for the eyes, on the bigger Snow Folks. (I use black metal paper brads for the smaller ones). Be sure to make a slight impression onto the wet paper mache head for your eyes then remove and set aside until the head dries, so they are 'set in' when you attach them later, and don't look like they are bugging out. 

7. When your Snow Folk's head is equipped with its mouth pieces, nose (mound or space to glue a polymer clay 'carrot' later), and eye indentations for larger heads are in place, prop head very carefully on something that will allow as much of the surface area to dry in open air as possible without disturbing the facial features. A glass or jar works great as a prop, making sure it doesn't create indentations in the head while its drying.

8. After the head is dry, paint off-white with acrylic paint, carefully avoiding the eyes and mouth, if already in place. Allow to dry.

9. Glue rhinestone or button eyes using E6000 or tacky craft glue. If using polymer clay 'coal' for mouth, fit small pieces back into the indentations you made, securing with adhesive. Allow to cure.

Diorama Contents:

1. There are many things you can fill your jars and bottles with. Each has its own style, and you get to choose which, or all of them! 
    • Acrylic 'Ice Blocks' (found at craft stores)
    • Faux Gingerbread 'Cookies' & Candies  
    • Glitter Dust & Faux snow create a winter wonderland.
    • Faux pearls look like snow balls inside their belly. 
    • Best of all, is a miniature scene created with tiny plastic 
    figures of children playing, forest animals frolicking, tiny bristle 
    brush trees, and holiday decor. 


2. Use your imagination and your long tweezers and wood skewers to arrange placement carefully, with E6000 on the bottom of each carefully placed item to secure it to the base of the jar. Allow time for adhesive to cure completely before filling with additional glitter and 'snowflake' accents. 

ASSEMBLY

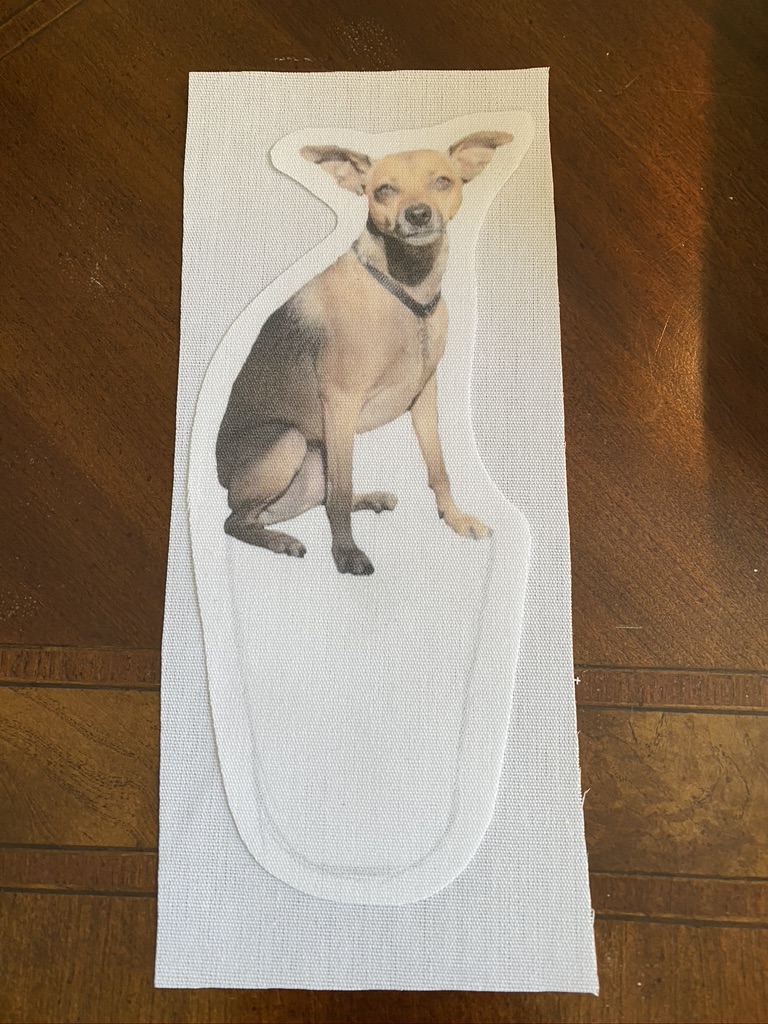
1. Make sure you have everything you want inside your jar, carefully placed and securely attached. Once the head is on, you won't be able to get back inside there without a struggle, so now's the time to make sure you didn't forget your pet dog!

Note: To personalize your Snow Folk, you can use plastic animal toys covered in sparkly glitter (in the color of your pet), to honor your favorite dog, cat, turtle, etc. Just raid your kiddos (or grand kiddos) toy box and find those random animals they never play with, or go to Party City or the craft store, and buy the particular animal you want. Cover the plastic toy with tacky glue, then pour glitter dust over the top, and allow to dry.

2. Play around with your Snow Folk 'head', decided which way it looks best when placed on top of your jar/bottle. Tilting to one side gives it a cute quizzical look, whereas a straight-on approach looks more serious and stiff. Once you have decided the positioning you prefer, place a heavy line of E6000 along the top rim of bottle/jar. (*Tacky Craft Glue is NOT my preference for this step, as it is more liquified and can drip down the inside of the jar...yes, I learned this from personal experience...gah!). Allow head to dry in place completely.

3. To cover the top of jar seam attachment of head, take a strip of muslin, or any other fabric you like, (the width and length will depend upon the size of the bottle/jar you are using); Dip fabric strip into a small bowl of watered down tacky glue, then wipe off excess glue liquid similar to doing paper mache strips; then attach end at top back of head and wrap around 'neck' of bottle/jar, winding down as far as you like to create either a 'neck scarf', or wrap further down the torso to create an illusion of an upper body. You can cut the end off, or tie a strip of muslin to create scarf ends. Allow to dry completely.

NOTE: If you plan to create 'arms' using floral sprays or garden twigs, etc., secure the ends into position as 'arms' while you are wrapping the fabric strip around the upper body, holding them in place securely as you wrap over multiple times.
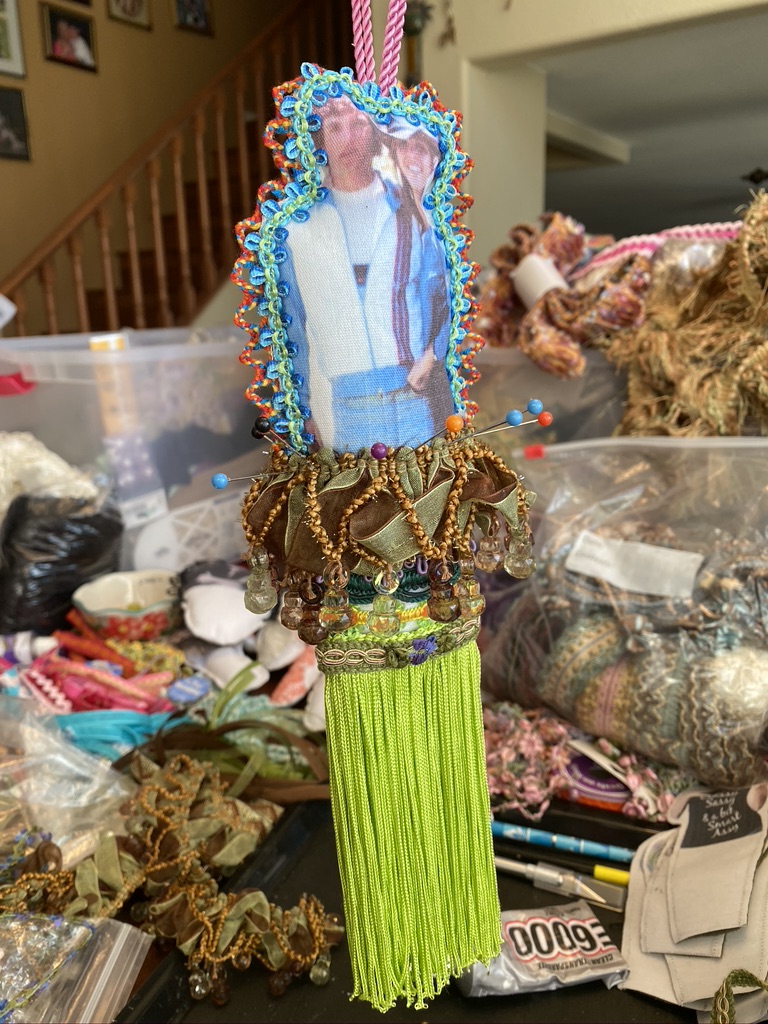
EMBELLISHMENTS


1. Here is where the fun really begins for me...digging into my stash of collected bits and bobs, laces, trimmings, frills and fibers! Go wild with your imagination, creating a hat, which can be made with everything from a salt shaker cap with sprigs stuck inside the holes, to an old perfume bottle cap. Wrap the base with frilly tinsel trimmings, extravagant yarns, etc. GO CRAZY! The wilder the better! Things do not have to match, and often look best when they don't!

Check your local craft store or online resources for miniature wrapped gift packages, faux mistletoe, mini pinecones, tiny holiday toys, jingle bells...which all looks SPECTACULAR when put together in a whimsical winter way! 

There is no limit to the places you can go, in embellishing your Snow Folks. You can create adorable hats, necklaces, crowns, head stacked holiday totem poles, toy sacks, anything your creative juices can conjure, just let your imagination loose! Look in the hardware store, the Dollar Store, check flea markets and thrift stores for things that other people might regard as trash, and turn them into TREASURES!! 
I even made a glow in the dark 'alien' Snow Folk for my nephew, so there are no boundaries to limit you! Think outside the box and you might be surprised what you can create!

2. Tie frilly tinsel cording and various sparkling accents to neck, around base of hat, and anywhere else you can find a place to tuck it in. Use alphabet beads to create a personalized 'name' accent dangles, or messages of holiday cheer.

3. Once you have decked your Snow Folk Jar with all kinds of random wonderfulness, it is time to MAKE IT SNOW!! What's a respectable Snow Folk without SNOW?!! 

4. Take your cheap wood 1" wide paintbrush (sold in packs at hardware stores and craft stores for cheap!), and dip it into the Acrylic Texture Medium (one of my favorite-not-so-well-known crafting techniques) and thickly paint it over all the areas you want to have a dusting of 'Snow' Glitter. I typically cover the head and most of the embellishments. Then working outside in your garage, or over a big box to catch the excess, generously sprinkle the glitter dust or snowflakes all over the wet texture medium. Allow to dry completely.

Voila! There you have it. A roadmap to creating your own family of Snow Folk, to grace your home or to shower your beloveds with an heirloom worthy gift of heARTwork!

Be sure to leave your comments and questions below, I would love to hear from you, and see what your own imagination brings!

Join Crafty Crusader's Private Group on Facebook here: Crafty Crusaders Private Group

You can find our Facebook Page here: Crafty Crusader Public Page
 
Happy Crafting!!

Deanne


Tuesday, July 7, 2020

Tassel Dolls Tutorial

Tassel Dolls

by Deanne Crim ~ Crafty Crusader


A few months ago...maybe it was even last year, I happened upon some beautiful paper doll art on Pinterest. They were jujjed up (my word for fancied and fabulous!) into spectacular creations that made me want to make a batch to play with. Okay, I've outed myself, now you know...I'm just an overgrown kid in an adult body!

I'm not a big scrapbooker, but I do enjoy crafting with paper and ephemera, however, its fragility always keeps me at bay for long term possibilities. For the idea spinning in my head, paper just wasn't long-lasting enough. You see, I like to create heirloom giftings that will last throughout generations, before succumbing to the 'decay' that life delivers, if I can make it happen. So I began to conjure ways to turn the paper dolls into real dolls.

Having played around with my computer printer and white canvas fabric previously, for a Vintage Valentine project, I knew that there was tremendous potential to create some incredible and personalized for special people in my life. Not only do my beloveds deserve to be immortalized in doll form for posterity, I needed a fun project to lift my spirits during this torturous 'quarantine' sweeping across the globe. What better way to distract my attention, than to create my own collection of dolls to play with?!!

Once I determined to get it done, I was on my way!!

First stop on the Tassel Doll project, was to choose images. I chose forward looking smiling faces, with enough upper torso that I could edit to create the upper half of the doll. The bottom portion would be purposefully blank, as there was no need to waste printer ink when the area was to be covered with trimmings.

My favorite FREE ONLINE photo editor is Lunapic where you upload your photo image and then use their tools to 'erase' backgrounds and other cool editing options. I use this website for many of my craft projects, and find it invaluable, especially being free!! Once you create a vector image (no background) you can save the image file to your own computer for future use. 

Then I created a regular ol' word document (because I don't own a photoshop program...I'm not sure why?) and I uploaded the doll images onto each page with as many as would fit comfortably, making sure to leave space in between for sewing/seam allowance, and be sure to add room at the bottom of each doll approximately the same length as the upper body, to create a lower body. Nothing fancy, just enough space to add a few inches below the image in a softened triangle or rectangle shape (that will later be covered with trim and embellishments).


After preparing the images it was time to cut white canvas fabric (you might also be able to use silk or muslin?) to the size of a standard letter size paper that would run through my printer. I used lightweight canvas fabric, not too stiff or it would fight with me while sewing the doll later. 


(This canvas fabric works wonderfully!)
 
  
(This is my Epson printer...nothing expensive or special, just a regular home unit)

   
(Initially I used the double-stick tape procedure, which ended up being unnecessary for me)

I did a test run to make sure the fabric would go through the printer smoothly and not jam, by using double-stick tape to secure the fabric to a piece of card stock. It printed well. For the next one, the fabric slipped off the card stock and went through the printer by itself, and worked PERFECTLY!! So I stopped wasting double-stick tape, and started feeding the fabric directly into the printer.  *If you plan to use silk or a lightweight fabric, I suggest using the double-stick tape method on card stock to insure you don't ruin the fabric and jam your printer.


(This image is actually Vintage Style Fabric Valentines printed in the same manner) 

Once I had my stack of doll faces/bodies printed onto fabric, I used a light pencil to draw an inverted soft triangle type shape to indicate the lower body. This is where the trim, lace, ribbon, and braids will be attached, so you don't want a sharp angle to the shape, just a gentle sloping taper. Then I cut out the image/shape, leaving a 1/4" edge extending past the image, where the embellishments will ultimately be attached.

       
(Who says Tassel Dolls have to be people? This is Koufax the Wonder Dog!!)

Using the cut-out image as a guide, I cut a similar size piece of luxe upholstery fabric for a decorative back. (Initially I planned to use the canvas fabric as a backing, but later determined that decorative upholstery fabric was a better choice, so my examples do not show the luxe fabric...oops!) I intentionally planned NOT TO TURN the pieces after sewing, because I didn't want a thick seam allowance to distort the shape, so its an easy process.  

If you plan to attach a hanging loop to your doll, now is the time to cut a piece of cording or ribbon, as it should be sewn into the doll assembly as you attach the front piece to the backing, for a secure attachment. You could also attach a hanging loop later with adhesive, but I like the idea of it being sewn into the structure. I chose to use two pieces of narrow twisted satin cord as a hanger, approx. 8"-10" long each. Form the cords into a loop; stitch along raw ends, then sandwich in between the front and back pieces at the center top, for balanced hanging.


Insert the cord/ribbon hanger in a loop shape (pin in place if necessary), catching the ends within the stitching line as you attach the front fabric to the back fabric. Using my sewing machine, I stitched around the perimeter of the photo image as well as the lower body shape, WITH RIGHT SIDES OUT, making sure to LEAVE A SMALL OPENING to stuff (I forgot this part the first time and needed my trusty seam ripper...ugh!) If there is a sharp corner or shape in the image, I try to soften it into a smooth curve with stitches, so the final product is pleasingly shaped with stuffing inside. When it comes to dog ears, you've got no choice, though! *This could also be sewn by hand, I just took the lazy way!!


After stuffing the shape, but not too full, sew the opening closed.

(They look partially naked here, I apologize!! haha)

Now its time to have some fun!

Note: On the first batch of Tassel Dolls, I used the same white canvas fabric for the back, making it necessary to embellish the white emptiness with lace medallions and other decorative textures. I glued the lace fabric in place, avoiding the large open net areas.


The next step is creating the decorative border around the doll image, as well as on the back side (to hide raw edges). I used narrow frilly trims, floral shapes, glittery tinsel, Furry yarn, anything I could find that coordinated or contrasted with the image and the color scheme, to create a whimsical effect. 

Again, using E6000 adhesive, I attached the trim, pinning it into place until the adhesive cured. *Note: You will want to remove the pins within an hour or so, otherwise you might find yourself with pliers trying to extract the glued pin!! (I know because I did it!) 

          
(In this first batch, I attached trim all the way around the doll, but soon discovered that it 
was not necessary to trim the lower body, which ends up being covered by embellishments)

Next comes the fringe bottom. I hoard...I mean 'have' various lengths of fringe and planned according to the size and shape of the dolls. Some beckoned for long fringe, others wanted just a short jiggle! Using E6000 adhesive...(I should buy stock in that company for all the product I purchase from them!!), glue a section of fringe around the lowermost edge of the body, wrapping around both front and back, then going around again for a second layer, creating a full and flouncy tassel base. Pin in place until the adhesive dries. 


I already know what some impatient crafters are thinking...

"Why do I need to wait for the glue to dry, can't I just use a glue gun that dries immediately?" 

My answer is an emphatic "NO!!! Absolutely NOT!!" 

Please do not ever use a hot glue gun for your heirloom crafts, I beg you!! I have personal experience with the heartbreak of glue gun fails, and it goes way deeper than just burning fingers. Glue gun assembled crafts DO NOT STAND THE TEST OF TIME!! They fall apart when hot weather turns to cold, and back again, and over time the glue goes from soft and grabby to cold and let-goey! 

As an artist, my intention is to create long-lasting remnants of my creative journey, whether for my personal enjoyment, or as gifts for my kids, family, and friends, and especially for items sold to customers ...which means it needs to survive or your reputation is kaput! Glue gun adhesive is subject to weather conditions and there is nothing as frustrating as pulling out a cherished work of 'heART' from a storage box, only to find it has disassembled itself in the cold to hot to cold weather conditions of life...I know, because it happened to me and I was not happy about it! A total loss...thanks to glue gun assembly, so I haven't used a glue gun in over 20 years...True story!

Beautiful embellishments, and vintage trimmings are my jam. I have boxes and boxes and BOXES of hoarded stash that I have collected over the past 35+ years. Its the same with beads, but don't get me started, thats an obsession for another day!! 


(Yes, my dining room table is a HOT MESS!!)

Finding a worthy use for my collection of exquisite trims is is what further fueled me to create these one-of-a-kind dolls. Some of these embellishments have lived in my boxes for 25+ years and I am thrilled to be using them in such a magnificent way!! 

(You can see here that some of the fringe was wonky and wrinkled...no problemo! Just get it damp and hang to dry, but make sure NOT TO GET YOUR IMAGE WET as ink may not be waterproof!)

I continued to add rows of trim and embellishment, pinning in place until cured, digging through my many choices with color schemes and themes in mind, using my trusty E6000 to give them permanent residence on my Tassel Dolls. I must admit, I am overjoyed with the results! 


Initially, I intended to get a head start on holiday giftings so I would be well prepared when the time comes, but once I finished these TREASURES, I am now suffering to get them off my table and into boxes to 'go home'!! I may have to enlist "Christmas in July" activities to soothe my impatient gifting soul?!!


"What on earth would people use these for?" you might be wondering...

Those who know me well, already know the answer...use them as EYE CANDY to make people smile!! Hang them where they will make YOU smile...where you can pick them up and make them dance! Anywhere you want be reminded how much you love someone! Put them in eyesight of visitors to your home, who will want to touch and play and explore! Hang them on your cabinet pulls, door knobs, and furniture handles for an added dose of whimsy throughout your home!

One of my favorites is the Tassel Doll I made for a new friend of mine, Carla Zmr. We connected unexpectedly through a Facebook craft group, and our Hawaiian connection bonded us immediately. I attended college, met my hubby, and lived there for 4 years, and have a deep connection to the islands. As it turns out, Carla's mom was a professional Hula Dancer for many years, and had recently passed away. She was heartbroken and inspired by a tropical hula necklace I had made, and reached out to me. To make a long story short, her mom seems to visit my heart, and inspired me to make Carla her own Tassel Doll, Hula style, using an old Hula photo of her mom. I haven't sent it off to her yet, and hope the surprise won't be spoiled by this blog post, but to be honest, I had to request the photo from Carla for the project, so she knows sumpthin is coming! Carla, if you see this first...SURPRISE!!! And I couldn't resist making one of her mom and dad in a more recent photo...I thought her dad might find comfort as well, and I'll let them fight over who gets which one!! <3


I hope you have enjoyed this tutorial and are inspired to create your own unique Tassel Dolls! If you do, I would love to see what you come up with! We each see the world through a prism of unique colors and ideas, and I am always intrigued and honored to see what my art inspires in others! You are also encouraged to share thoughts and questions in the comment section below, I would love to hear from you!!

Happy Crafting!
Deanne Crim ~ Crafty Crusader

www.craftycrusader.com


Wednesday, July 17, 2019

Garden Tea Party Extravaganza!


There has been a lot going on with this Crafty Crusader® lately, keeping me detoured from my blog, so I sincerely apologize for neglecting you! I am back with a bang, so grab a cup of tea and a cookie and have a good read...

Recovery from my recent Garden Tea Party Reunion Luncheon for 60+ dear friends, has finally been achieved and I am relishing in the memories! Anyone who knows me has a pretty good idea that my events are out of this world, both in the edible particulars and the creative details, and this party was no exception! It was a labor of love, in the works for 6 months, from the moment the idea crept into the cockles of my mind. 

Those Tippy Tea Cups...they did it to me!

"Tippy Tea Cups" by Deanne Crim - Crafty Crusader®

I'm getting ahead of myself, but that's where the seed was planted. 
I should explain... 

My online friendship with a wonderful lady I met on Facebook (many years ago), led to a gifting of several antique tea cups when she discovered my penchant for them, discussing my inheritance of a portion of my Granny Annie's extensive tea cup collection. Wendy had a few tea cups from her own grandmother that she didn't use and felt guilty about, so when she heard I wanted to do some crafting with tea cups, she surprised me with a box in the mail! She felt that having them immortalized would be a good thing to honor her grandmother. What a great friend, eh?!! 

Wendy's grandmother's tea cups were soon followed onto my porch by one of Wendy's friends who had seen her Facebook post to me regarding my thank you message for said tea cups, got my address and surprised me with four more treasures from her own family cupboard. How lucky am I?!! They had been sitting in my craft room with Wendy's for over a year, daring me into some kind of tangible action!

Ideas swirled in my mind for crafting with tea cups. I was fairly certain I didn't have the heart to take perfectly good tea cups and smash them into bits for mosaics, as I initially intended. A few were broken from shipping but I was able to reconstruct them with E6000® adhesive, and not a crack was visible. Phew!

It was my desire to create something whimsical and worthy of the heirloom treasures they are. Then I remembered the intriguing floral decorations I had seen a few years prior, with teapots and tea cups, flower cans and crystals...as if they were 'pouring' out the contents into a saucer or receptacle of some kind, with magical gravity-defying splendor! 

My creative intention came with specific thoughts on how to assemble my own version, less heavy handed then the ones I had seen - something I could assemble with a more delicate touch that created a better sense of motion and 'tumbling out' of the contents. But what actual reason did I have to make these wonderful centerpieces? Nothing...nada...zippo...zilch...and that is where my extravagant tea party plans began! 

Garden Tea Party Extravaganza - Part 1:

When it comes to entertaining, FOOD IS KING! At least it is to me. It has to be pretty, somewhat simple to prepare for a large group of people, hopefully made easily at the last minute, or at best, frozen ahead of time. Most of all it must be DELICIOUS!! 

I have a thing for small bites. I could actually live on hors d'oeuvres, and if I'm being totally honest, I would prefer to! So this kind of a party is right up my alley. 

The extensive menu of savory delectables and sweet treats included: Candied Bacon Skewers (non-traditional tea party fare but DEVOURED by guests!), Fruited Curry Chicken in Endive Cups (overheard to be "The best thing I've ever eaten" by an oohing guest), Cucumber rounds with Herb 'Cheez' Smoked Salmon and Fresh Dill Garnish, Strawberry Delight Bites, Classic Egg Salad Bites w/ Chives, Traditional Tuna Salad Bites, Strawberry Candied Pecan Baby Greens Salad w/ Strawberry Vinaigrette, Krab Melange Salad, Crazy Rice Salad, Greek Salad, Strawberry Delight Bites, Apple Walnut Cinnamon Salad (Charoset), Vanilla Bean Scones, Homemade Rose Petal Jelly, Chocolate Dipped Strawberries, Lemon Cake 'Butterflies' with Homemade Clotted Cream and Lemon Curd, Pecan Tartlets, Springerle Hand-painted Cookies, and favor bags with 'Sweet & Garlicky Party Mix' (otherwise dubbed 'Party CRACK' by my close friends who cannot get enough of the addictive snack!)


My dear childhood friend, Marcelle and me, getting the buffet ready for the tea party reveal!


Do we look as exhausted as we felt? I was up until 3am the night before with last minute food preparation, and Marcelle had to get up at 4am to drive home to get her makeup case which she had forgotten!! Its a miracle we were upright for the party, but the energy and buzz of guests kept us going strong...don't ask about the next 2 days of being a useless wet noodle on the couch! 


The tempting buffet table of scrumptious food...
Special Thanks to my Mom and her EXTRAORDINARY collection of
Sterling Silver - on display in her SPECTACULAR Dining room! 


Fruited Curry Chicken in Endive Leaves


Strawberry Delights w/ Fresh Basil - Strawberry Jam & Cream 'Cheez' (vegan)


Traditional Egg Salad with Chives on soft (gf) bread diamond shapes.


Classic Tuna Salad on soft bread fluted squares.


Cucumber rounds with Herb 'Cheez' (vegan) & Smoked Salmon with Fresh Dill


Chocolate Hand-Dipped Strawberries

Springerle Molded Cookies - drying for 24 hours - made with Vintage Replica Cookie Presses.


Hand-painting Glaze Details on Springerle Cookies.


Springerle Molded Cookies - Lemon Cake Butterflies w/ Lemon Curd (background)


Baby Bundt Chocolate Bites w/ Raspberries and Pecan Tartlets.

 Sweet & Garlicky Party Mix


Fresh Strawberry Lemonade


It was quite the affair, to say the least! Friends are still talking about it and sharing their photos with me. They felt the LOVE that I infused into the party...the entire reason for doing it was to show APPRECIATION for a lifetime of friends whom GOD has chosen to be the golden threads in the tapestry of my life!

It is my hope that this inspires you to do something...be it a small tea party for two of your friends with a few special nibbles, or a giant charity event with your church family...start thinking outside the box! Being a facilitator of JOY and GOOD TIMES is truly a GIFT to the lives of others...don't underestimate how much you can lift another person's spirit just by including them in something fun, be it big or small...its always the thought that makes the biggest impression...to include others is a HUGE BLESSING!!

If you are interested in getting any of my tea party recipes
please leave your comments and requests below! :) 

Stay tuned for upcoming blog posts...
Here is a sneak peek: 


(Learn how I made these EXTRAORDINARY Centerpieces)
"Tippy Tea Cup" Centerpiece by Deanne Crim - Crafty Crusader®


Table Setting Decorations, Favor Giftings, Napkin Ring 'Bling'


Floral & Bling Photo Frame - for Unique Technicolor Guest Photo Experiences!


Let me know what you think in the comments below!

Happy Crafting!

Deanne Crim - Crafty Crusader®