Wednesday, March 11, 2015

Lucky Little Leprechaun! (Thread-wrapped Miniature Doll Tutorial)


As I have mentioned previously, I have a mad love affair with miniatures. 
Itty Bitty ANYTHING makes me happy...okay, giddy!
This litte leprechaun is a perfect example!

I call him "Smijjin O'Toole"...it just fits. 
He is about 1-1/2" tall, give or take a tad. I made it as a Good Luck charm for the upcoming year...having my own leprechaun couldn't hurt, right?!! It can be a pocket-charm or you can add a jumpring to wear it on a necklace. 

It is crafted by creating a wire armature, then wrapping evenly with fine weight yarn or embroidery thread, then creating clothing using colored thread/yarn, and accessories such as his hat. I chose to leave his face blank so he has the ability to create whatever magic he needs with the appropriate expressions!


SUPPLIES:

20 or 22 gauge wire 
(I used copper color, but silver or any color is fine to use)

Deborah Norville Collection "Serenity" yarn
(sample uses cream color for armature & skin tone and uses varigated color yarn cut apart to make shirt & pants colors)

Embroidery thread in assorted colors 
(hair, hat & shoes)

Scrap piece of Chenile Stem (pipe-cleaner) for hat

Tacky Craft Glue (Aleene's® Fast Dry works great)

Nail Polish: Green for Lucky Clover & Glittery Green for a top glaze


TOOLS: 

Small Sharp Scissors

Wire Cutters or Heavy Duty Scissors 

Work Surface or Plastic Tray to contain project


INSTRUCTIONS:


1.  Take a 5" (inch) piece of wire and bend in half, keeping a rounded fold (top of head).


2.  Squeeze just under the bend to form a neck area. 


3.  Twist to secure.


4. Continue twisting to form the torso. The ends become the legs. 


5.  Take a 3" (inch) piece of wire (for the arms) and lay behind the torso just under the head. 


6.  Wrap one side of wire around the torso to secure. 


7.  Repeat with the opposite side wire to secure. 


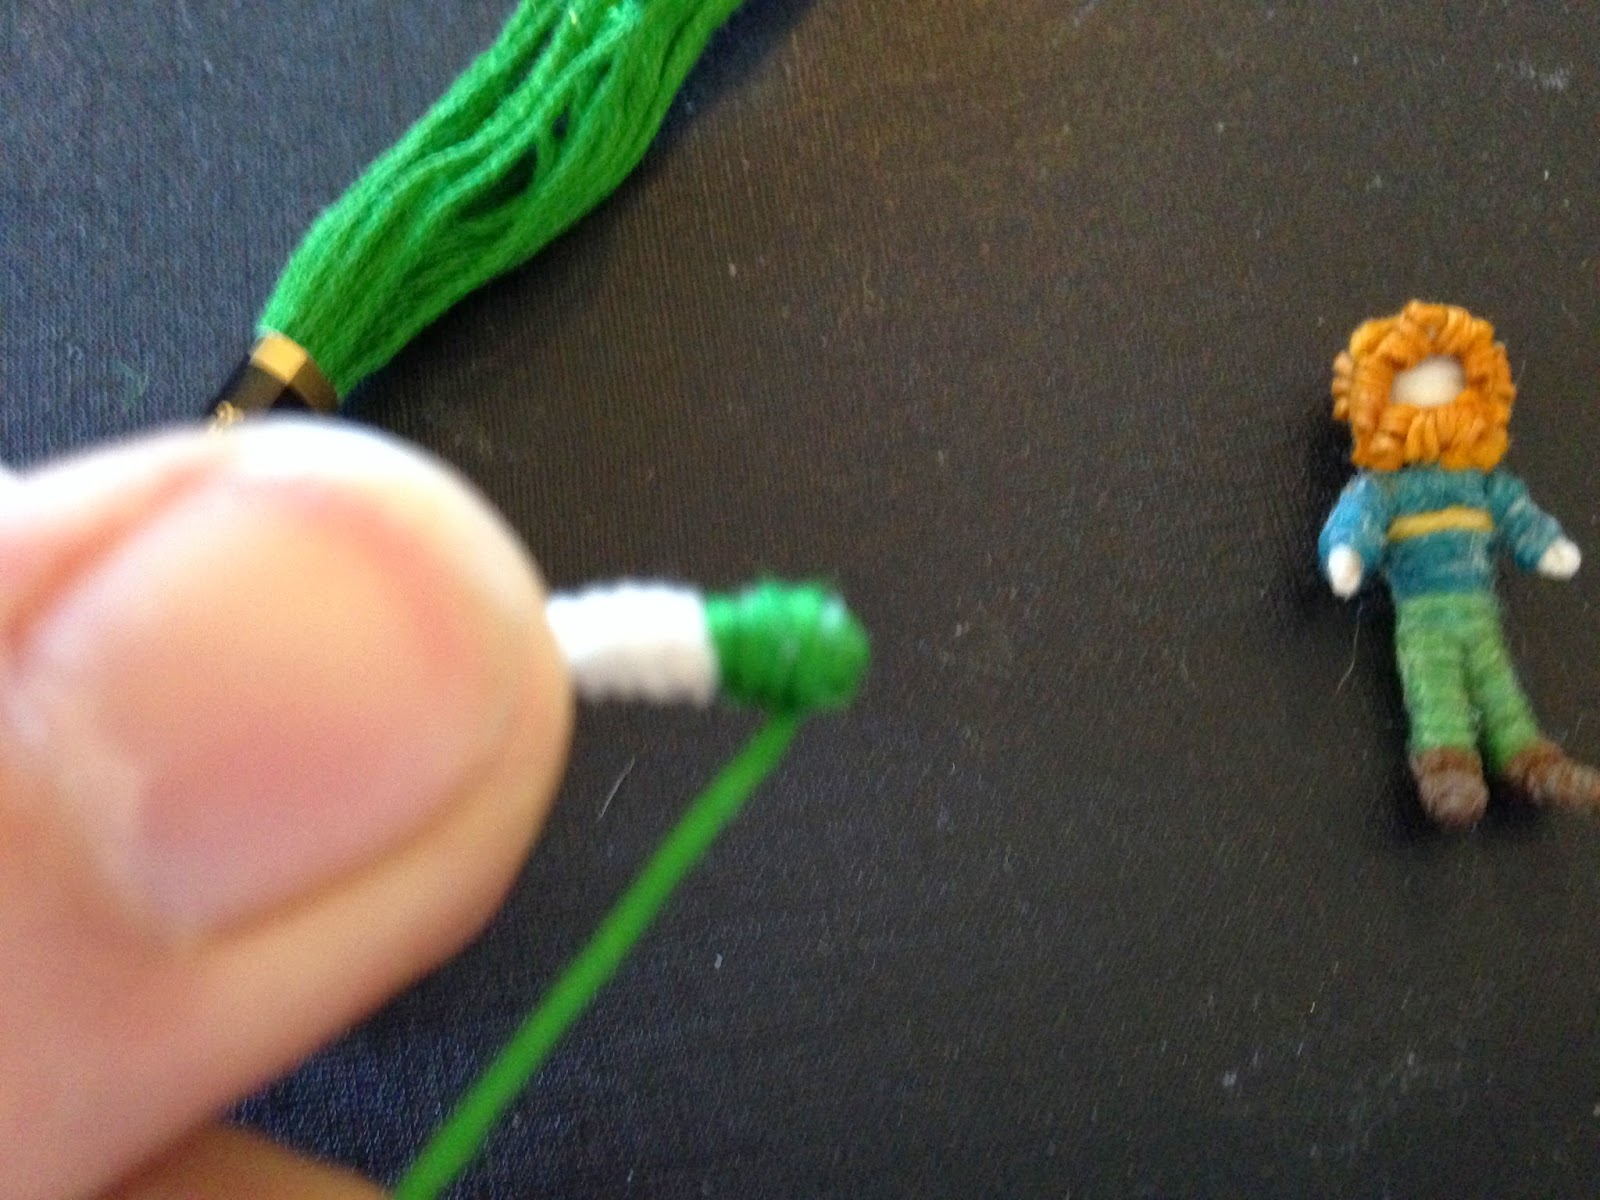
8.  I used Deborah Norville Collection "Serenity" yarn to wrap the wire armature. You can also use embroiderery thread in flesh tone or any color of your choice. 


9.  Place a small line of glue along the lower half of arm, then lay yarn/thread across wire and begin wrapping tightly in place, covering wire, leaving 1/8" of the wire end open (DO NOT CUT THREAD), then carefully bend wire inward towards body (creating a tiny loop as the hand) with the thread still attached. 


10.  Place a tiny spot of glue on the thread and wire then continue wrapping up the arm. Overlap the thread as you are wrapping if you find that the limb is too  skinny. When you get to the top of arm, end the wrap on back side and place a small spot of glue, then secure the thread/yarn and cut off. 


11.  After cutting the thread, place a tiny spot of glue on top of the cut end then use your clean finger to swipe across the glue and thread end to press flat in place. The glue will dry clear and will help to hold other wraps in place for additional security. 

(You can see from this photo above, that the arm is a bit thick...thicker then I like actually...I had forgotten to take photos of this part of my original leprechaun and had to make a re-do so I could show you details, so the arm is not accurate for what the finished doll is.)


12.  Repeat wrapping on opposite arm, then take thread up to neck area (no need to cut the thread after finishing the second arm), and wrap up neck to top of head. Place small dot of glue on top of head to keep thread from rolling off. Swipe your clean finger across glue to spread and cover threads to secure. 


13.  Continue wrapping thread to create a full oval head shape, then place small dot of glue on back of head, secure thread in place then trim off. Apply additional glue across back of head and swipe with a clean finger to spread glue across threads to secure in place.


14.  Wrap legs as done for the arms, leaving a larger bend/loop at the end for the feet. 


15.  Place a small dot of glue above bend for foot and continue wrapping up leg. 


17.  Finish off thread end at back side of top of leg. 


18.  Wrap opposite leg then continue wrapping up torso to fill out to the size you desire. Mine is a svelt leprechaun but you can create a pot-bellied leprechaun if you prefer!


19.  You can see from this photo (above) that it would be really easy to transform the body into a scary "Mummy" for Halloween! Just leave some threads hanging in various places and voila!


20.  These varigated yarns from Deborah Norville Collection® Premier yarns are ideal for making thread wrapped doll clothing. You can cut the colors into separate pieces as needed and get a huge palette of colors to choose from at a fraction of the cost of buying multiple skeins of yarn colors. They have cool muted tones as well as bright jewel tones that give a different look than the embroidery thread colors offer. 


(*Sorry I forgot to take a photo beginning to wrap the shirt!) 

21.  To wrap the shirt, start with securing the thread with a dot of glue at the back of the torso. Wrap evenly to the shoulder area, then wrap a few criss-cross times across the chest/back areas to hide the armature wrapping that may be showing through. Do not cut the thread just take it over to an arm and wrap down to the length you want the sleeve to be, then wrap back up the arm for a second layer of color. Now take the thread across the upper body (in the easiest most diguisable place) and begin wrapping the opposite arm down to the corresponding sleeve length, and back up to the top, then glue off the end at the back of arm/torso area


Even before he has his pants and hair, I can tell he's a feisty lil guy! 


22.  Wrap pants by gluing the end of thread as an anchor point at back of torso just below the bottom edge of shirt, then wrap upper pants to cover armature, then begin to wrap down the leg to length desired. Be sure to leave room for boots/shoes.


He is starting to come together!


23.  To make his boots, first take your thread (color of choice) and with a tiny anchor point of glue at bottom of (bent) foot, then taking it across the toe with a dot of glue on the toe; allow to dry for 2-3 minutes, then continue wrapping around foot up to the shoe/boot height you desire.


These leprechaun boots are made for walkin'!!


24. To make curls for your leprechaun's hair and beard, wet the embroidery thread and wrap around a toothpick then allow to dry completely. 


25.  Slide dry curls off toothpick for soft supple curls. If you want stiffer curls, you can put a bit of liquid starch on the embroidery thread, but it gets pretty stiff. 


26.  Cut curls into small pieces (approx 1/8" - 1/4" long) for my leprechaun boy...but if you want to make a girl, cut the curls longer.


27.  Place a generous amount of glue on head in the place you want hair to be. I generally start with 2 or 3 strands at the top of head framing the face for "bangs". Then I add a strand or two to each side of the face. From there, fill in the back and top of head, nestling the curls snuggly with the glue tighly next to each other so you hide the head underneath. 


28.  Make sure that no white "scalp" shows through on your leprechaun's head...we don't want a balding fellow, do we?? 


29.  As you can clearly see, Smijjin O'Toole has magically appeared with a beard...Sometime during the wee midnight hours, it just appeared on his face! 
Okay, maybe his beard didn't just appear...maybe I forgot to take photos of gluing those teensy weensy curls to his chin? But isn't it more fun to think it grew all by itself? 


30.  The tophat begins with a scrap of cotton chenile stem. Fold over 1/8" of the stem end. Put a small dot of glue to anchor the end of thread that will cover the tip of the top of the tophat. *When you wrap wire or chenille stems it is very difficult to hide the exposed end, so it is important to hide it as best as possible when you begin, such as is done here. 


31.  Wrap tip of chenille stem approx 3/16" (size of a matchstick head), adding a swipe of glue to secure it. Continue wrapping to create a tophat shape or you can make a different style as your imagination leads you.


32.  To make the brim of hat, begin wrapping thread at base of tophat wrapping on chenille stem, then add thin line of glue along each round of the thread that is wrapped upon itself (applied with a toothpick) to build up the tophat brim. Approx 3 or 4 rounds should be enough to create a nice brim. Cut of the thread, securing in place with an extra swipe of glue with a clean finger, if necessary.


33.  To add a hat band to your tophat, pick a color and glue an anchor point to the back of tophat just above the brim. Wrap twice and glue at back to secure in place. 


34.  Using metallic gold embroidery thread cut 4 small pieces (1/16" each) then glue in place to form a "buckle" on the hat band.


35.  Cut tophat off of chenille stem.


36.  Decide where you want to place your hat on the leprechaun. 


37.  Place a small puddle of glue on head to attach hat.


38.  Attach hat to head and press firmly to secure. Set aside to dry.
I also added a stripe to his shirt. Just one wrap of a contrasting color to add some character to his clothing. 


To make the Lucky 4-Leaf Clover:
Using 22 gauge wire, wrap a loop around a tootpick 


Holding the two wire ends, twist to form a loop.


Continue twisting for 3 full twists to secure. *Wire can break easily if it is bent back and forth, so twist, do not bend back and forth.


Remove the loop from toothpick and repeat the process to create a second loop and twist to secure. 


Repeat the process until you have 4 loops, then bring the two wire ends together, gathering the 4 loops together forming them into a clover shape with petals evenly spaced apart. Twist the wire ends together as you hold firmly to the top 4 loops, making one stem.


Gather green nail polish and some glittery green for enhancement on top, if you like it. *Old thick nail polish works best but you can definitely use new polish as well.  I have a 3-leaf clover above, but 4-leaf clovers are thought to be the lucky ones.


With your nail polish brush draw the polish across the wire loops one at a time. The polish will grab onto the wire frame of each loop and fill in the middle. If your loops are really large, make sure to be touching both sides of the loop wire so the polish will grab, otherwise the polish will not grab the framework and fill it in. This is why the thicker polish works best, it grabs the wire framework. 


Using embroidery thread, wrap the wire "stem" to cover with green.  Anchor it with a small amount of glue on the wire. 


Continue wrapping on glue covered wire to secure it firmly in place.


Attach the lucky 4-leaf Clover by tying it snuggly to leprechaun's arm with green embroidery thread to match the stem wrapping. Tie a knot on the back side, then trim and place a tiny amount of glue on knot end to keep from coming untied. Coil up the stem end by wrapping a few times around a toothpick to give it a cute curl.

Voila!

Your Luck has Arrived in Adorable Style!!

Be sure to let me know what you think about the project in the comments below and post photos of your creations, I would LOVE to see them!!! 

With Big Sugarplum Hugs!

Happy Crafting!!
Deanne


Thursday, February 19, 2015

Tiny Treasures: Best Friend Toothpick Dolls


I have gone off the deep end...

Its official. I can feel the plunge!!! 
The wind is blasting past me as I descend into the fray... 
I LOVE THIS FEELING!!!

A Creative Journey at its inception...

For many years, I have been an obsessed miniaturist. 50 years, in fact. (I started as a toddler and still have many of the treasures I collected). I am an enthusiast of epic proportion when it comes to tiny things. Whether it is caused from the fact I was always the tallest girl in my class practically until I reached high school or not, I am not sure. But I am fascinated, even enraptured on many occasions, by the wee world of miniatures. My new obsession with these thread-wrapped Toothpick Dolls....Tiny Toothpick Treasures, actually...trumps any mini love that has come before...at least for this week!


(This Sweet Altered Tin is a Secret Doll Hideaway for a Toothpick doll and two Matchstick Dolls, that I made for my niece's birthday surprise!)


Vintage crafts and toys have always stirred up in me a deep sense of tradition and culture. A welcome stroll down memory lane each and every time I see a new treasure from the past. What I truly love is to re-create those old-fashioned trinkets and treasures with a contemporary twist...that twist?....ME, of course!! lol

Whether its these delightful thread-wrapped Toothpick Dolls, Pom Pom Critters (such as Steiff's vintage wool puff animals and characters from Germany in the early 1900's), Pop-Up (Push-up) toys from Folk Art Toy lore, or handpainted Wooden Peg Dolls and Clothespin Dolls, the endless list of vintage primative crafted toys captivates me. I have grandiouse plans to explore this long lost world of humble toys and create an entire library of FREE TUTORIALS on making these wonderful heart-stirring trinkets. I am of the belief that something does not have to be technologically complicated or extravagantly expensive, to be extraordinary!!

When it comes to old-fashioned crafts, I am inspired by the fact that most are made using the most basic of supplies. Nothing fancy or outlandish. People in the past did not have the resources nor the finances that most of us have at our fingertips today. They made do with what they had on hand. Often, they did not have much. Toys were a luxury. Most were handcrafted by parents or grandparents, aunties & uncles. There was love spun into the toy by virtue of the intention of the craftsman. The best part is that the love lasts long after the toy is gone...the memory will always carry the love.

On a practical level, I get an artistic thrill out of taking humble meager supplies, and turning them into Artful Treasures. Such is the story with these Toothpick Dolls. The only thing you need is a few wooden sticks, scraps of embroidery thread, and some glue, and voila! You have a pocketful of Sunshine, with these tiny dolls filling your heart and your most secret places.

I am an overgrown kid. My home is full of toys and dolls and things that make my heart smile. These Toothpick Dolls make my heart smile. I am happy to share them with you, in the hopes that your heart too, will smile wide! Maybe you'll be inspired to make a few for yourself or your favorite miniature loving friend, or your most beloved kiddo? If I can inspire you to explore, to create, to share...I have achieved my goal!!


There are several free tutorials on making Toothpick dolls. (Though none I have found on making Matchstick Dolls like the one my toothpick doll is holding, so I will be making one for you ASAP!) 

 The best Toothpick Doll tutorial that I have found is by Emily Bishop. You can find the first of her 4 part series of FREE video tutorials on making Toothpick Dolls HERE.

For my own Toothpick dolls, I have followed similar tutorial steps for the most part. You will see, once you get into the crafting, that it is a simple process, and can be adapted as you find necessary. 


Supplies & Tools you will need:

*Small Sharp Embroidery type Scissors (to cut thread)
*Heavy Duty Scissors or Kitchen Shears (to cut toothpicks to desired size)
*Emory Board or Small piece of Sandpaper to soften edges of toothpicks
*Toothpicks (Blue Diamond brand is my preference, which offers 2-styles, a classic one with pointed ends and an "elegant" version (as labeled) which has a decorative lathed end which works well for feet and hands)
*Fast Dry Tacky Glue (regular tacky glue can also be used successfully)
*Embroidery Floss in various colors

For each Doll you will need the following sized pieces of toothpicks:
2 pieces - 2" inches long (for legs)
1 piece -  1-1/4" inches long (for head/body) with a pencil mark at 5/8" (to specify the center)
2 pieces - 1" inch long (for arms)


 Depending on toothpick styles, you may or may not have a decorative end on one side of your toothpick. If you do, I suggest using the blut end (decorative) as the "shoe" and "hand" ends. They will provide a good base to wrap the thread and create a rounded end.


(When you glue the body together, decide whether you want the feet/legs to be slightly apart and straight in their form, or if you want a "Fashion Model" style doll which has legs/feet that come together at the base. You can see from the photo that by using the pointed end of the toothpick for the "crotch" area in between the legs, it will create a slim tapered line with the legs that bring the feet together snuggly. If you use the blunt end of the toothpick at the "crotch" of the doll, it will create a wider separation of the legs. It is entirely your choice. Either way looks adorable as you can see from the various samples)


For the dolls body, glue the legs to either side of the head/body piece, lining up the pointed ends of the toothpick with the pencil marking halfway on the head/body piece. Set aside to dry completely.


Once the body is completely dry you can begin thread wrapping your new little doll. Start with the color thread you want to use for the torso. Decide which side will be the back, so that you can remember to ALWAYS ONLY PUT GLUE ON THE BACK SIDE OF YOUR DOLL. This will keep it looking neat and tidy on the front, which is what matters most, right?!!

Place a tiny (and I mean TINY) spot of glue to anchor the end of your thread on the back (near where the "rib cage" might be) and let the glue dry. It will only take a couple of minutes and then the thread will be securely attached. If you start wrapping too soon, the end may come off and that would be a tragic tale in the making of your mini masterpiece!


(This photo is a different sample doll then the tutorial project but the wrapping process is the same. Wrap until the dress/shirt is the length you desire. If you want to change colors for stripes, just glue off the end on he back, and start a new color on the back side)

When you begin to thread-wrap, you will find that you can either twirl the body piece while you hold the thread in place OR you can hold the body piece securely while you wrap the thread around it. I tend to do a little bit of both, depending on what piece I am working on. However you feel most comfortable in wrapping the toothpicks is good...it isn't rocket science, its toothpick wrapping, right?!! lol

There are no mistakes. You can wrap whichever colors you want, for as long as you want, in order to create the "clothing" you are simulating. When you get to the end of the area of color you desire, just place a tiny spot of glue (use a toothpick as a tool to control the amount of glue you place on the doll) ON THE BACK SIDE IN LINE WITH WHERE THE THREAD IS LINING UP ON THE DOLL, then lay the thread into the glue spot and press down with your finger firmly, then trim the thread. To add extra stability, place a tiny amount of glue over the cut end and use your clean finger to rub the glue across the thread end and over into the other threads of the piece. MAKE SURE THE GLUE IS ALWAYS ONLY PLACED ON THE DOLL BACK SIDE!


(After wrapping the clothing to the desired length, begin to wrap skin tone thread around each leg, starting with a secure glue spot on the back side of one leg. Wrap closely, dabbing a spot of glue when you get to the end of the feet, or where you want your "socks" to begin)


*IMPORTANT NOTE:

If you wrap too closely to the end of the toothpick at any point in the process, the wraps may possibly come rolling off the end (which is annoying and frustrating), so I like to place a tiny dot of glue near the end as I approach it with my wrapping. then I wrap over the glue at the end point, being careful not to go "over the edge", then I slide (in the direction the thread is going) my clean finger over the thread to smooth the glue and the fibers into place.


Deciding whether or not you want separately wrapped legs or a long "gown" wrap which goes over both legs together, is probably your biggest choice in crafting Toothpick Dolls. You can do an internet search via Google (or your favorite search engine) to see various photos of the styles of Toothpick Dolls that other crafters & artists have come up with. I happen to prefer the look of separately wrapped legs, so often I will combine a "gown" look in a shorter length so that I can wrap legs below the hem. It gives more of a real doll look, as opposed to a "mummy" look. lol


(These dolls are the beginnings of Princess Elsa & Sister Anna, using metalic threads. I will post photos when they are finished.)

Once you have the body "clothing" wrapped in place, shoes included, you can begin work on the arms. Arms are wrapped separately then glued to the body. Begin by anchoring your thread in place with a tiny dot of glue on the back side of the arm up near the point (which will be the shoulder), but it does not need to be exactly at the tip. If some tootpick shows, its okay because it will be covered by thread wrapping at the shoulder area. (Pointed end of the toothpick is the top of the arm which gets glued to the body).

Wrap arm down towards hand (wide end) using either a skin tone color thread OR a matching/contrasting color sleeve to match the clothing on the body. When you get to the end of the color area, place a smal dot of glue and secure end in place, then trim. Add skin tone for hands if you have been using a contrasting color. Repeat for opposite arm. Set aside to dry.


Glue arms in place on sides of upper body at the place where torso wrapping ends. The protruding toothpick at the top of the body is where the neck and head will be wrapped next.
(See Emily Bishop's youtube tutorial for detailed instructions on wrapping the head: Toothpick Doll Tutorial Part 2

To make the neck and head, anchor the end of skin tone thread on the back side of lower neck. When dry and secure, begin wrapping up neck to top head area. When you get to the very tip of head, place a small dot of glue to insure that the head wraps will not come off the edge. Cover the entire neck with one smooth even wrap, then increase wraps at "chin" area and forehead area (leaving a small "valley" in between the forehead and chin (this helps to establish a more solid foundation for the head). If you just wrap a growing oval shape, the thread will often tend to roll off the end and create a mess, so I have found that this method of creating two separate small "mounds" at the chin and forehead first, then filling in the center valley area as I wrap back and forth between the chin/forehead mounds.

I like to create a somewhat oblong shaped head, as opposed to a perfectly round circle. I think it has a more realistic effect and it also happens to be the easiest way to make a head for me.


(You can see from this photo that the head has more of an oblong shape)


If you want to have a really round head for more of a cartoon style character, you can use an 8mm or 10mm wood bead (unfinished so it will take the thread wrap more successfully). If you want to use a bead for the head, first wrap a layer of thread on the neck stick so that the bead hole won't be too large. Fit the bead on snuggly while gluing securely in place. Continue to wrap around bead as you would to cover other parts of doll. Glue ends in place to finish off cleanly.

(When wrapping shoulders, I will often make a criss-cross with the thread, wrapping across the upper body and around the back side, which makes it easier to fill in the shoulder area smoothly. This is not necessary, but it can be helpful when threads and toothpicks are not being agreeable. I also place a tiny dot of glue along each shoulder edge to make sure the threads don't roll off) 


(Secure the end of the upper body wrap with a tiny dot of glue on the back, then smooth with finger)


To make "shoulders" you will simply wrap a chosen color of thread over the upper arms area. Anchor the end of thread on the upper back of doll and allow to dry securely. Beegin wrapping at the lower neck area and wrap downward towards the waist, until you have covered the exposed toothpick area. Glue the end in place on the back side when you reach a desired look. Trim thread end.


(I used a single-strand of embroidery thread to crochet a scalloped lace edging for the bottom of the dolls dress. If you crochet, it is easy peasy, just chain enough to fit the circumferance of the doll, then chain an extra 5 sts and slst into the 6th st from hook, ch 5, skip a stitch and slst into the next stitch, repeat to the end of the row, then finish off, and glue carefully into place on bottom edge of dress.


Making hair is where you will really give your Toothpick Doll personality. You not only have the choice of making girls or boys with these tiny dolls, but you can also get as detailed on the hairstyles  as you have the gumption to do! Long straight hair with bangs, Curly locks like Shirley Temple, Braids, Butch-cut...whatever your little heart desires can be put into action on your doll.

In the most basic of conceptions, you are just trying to cover the bald head, right?!! So that is your ultimate goal...cover the head. Your next goal is to do it in a cute way, so look through various doll hair styles on Pinterest, or your favoirite internet engine search for "miniature doll hair styles", and you will come up with endless inspiration.


The technique of creating tiny doll hair involves attaching cut pieces of embroidery thread across the "scalp" in as natural a manner as possible. Considering there is NOTHING natural about a 2" Toothpick Doll, you have CREATIVE REIGN!! I give you permission!! There are NO RULES!!! 


(Cut 5-6 tiny pieces of embroidery thread for bangs, if desired, and glue across top of head)


(Using 2-inch pieces of thread, fold in half and glue the folded end at the top of the head next to the bangs on either side. Repeat these loops all across the back of the head, meeting the edges of where the back side of bangs cover head to make sure you hide the scalp) 


(After you have covered the entire head with long strands of hair, take a strand of hair and using a small line of glue across the "headband" area of head, lay strands of hair to cover the raw edge folds of the underside hair strands. Repeat this process with 2 or 3 more strands to create a clean hairstyle. Be sure to use minimal amounts of glue so the doll doesn't become a gluey mess!)


Make Rainbow hair if you'd like to, I promise I won't judge you!! 
I once had Rainbow hair myself, so I'm no one to talk! 


(My Matchstick Raggedy Ann doll is the perfect example of how to make Curly Hair using embroidery thread, moistened with water and wrapped around a toothpick, let dry)
*Free Tutorial on making Matchstick Raggedy Ann & Andy, to follow soon!

Curly Hair: To make ringlet curls, take a strand of embroidery thread and get it soaking wet, then pat dry; wrap it around a toothpick and set aside overnight to dry completely. When it is dry, carefully slide off of the toothpick and VOILA! You have ringlet curls!! Cut ringlets to size desired and glue in place. 

You can also use two toothpicks (one for each end of the cut piece of thread, if you want to have smooth hair in between the curls, so they can drape over the head with it being straight across the head, while having ringlet curls on the ends. (I hope that makes sense?)


Braids: To make braids, its important to lay the hair out so that it will have the braids positioned in the spot you prefer, whether it is pigtail braids, or a high knot ponytail braid. Think it through and experiment BEFORE you pull out the glue. It is quite often best to cover the "scalp" first with a foundation layer of hair, and then come back and add the braids in separately, gluing them in place, rather then trying to "plant" the hair and braid it afterwards. Experimenting is the best way to find out what works for your doll!


Embellishments:
Adding tiny details to your doll will take it to the next level. In addition to detailed craftsmanship, these extra touches can add tremendous character to your creations.

Tiny Bows: Using a single strand of embroidery thread OR sewing thread, tie tiny bows, just as you would tie your shoe with a bow, pulling the tail ends carefully and sloooooowwwwly until the loops are extra tiny and evenly matched. Trim the thread ends. Place a teensy weensy dot of glue at the center back of the bow to make sure it doesn't come untied. Bows in matching or contrasting colors can add just the touch of perfection you need!

Crystals & Beads: These tiny additions can transform your doll from beyond a crafty trinket and into a work of art. You can create stunning fashion show worthy art dolls by simply adding sparkle and twinkle in the right places....a neckline, a hemline, perhaps a tiny diamond ring (crystal) on your dolls hand? Let your imagination run wild! What about a glorious "bead encrusted" bridal gown? And what about a custom designed bridal party to match the gowns worn by your favoirite brides' maids?!! Wouldn't that be a lovely gift for attendants in a wedding?!

Polymer Clay Embellishments: Fimo, Sculpey, Primo, Paperclay...you can use any or all of these brands of polymer oven-bake clays or air-dry clays, all to make exquisite accessories for your dolls. Whether it is teensy weensy buttons for your dolls clothing, hair barrettes towear, Purses to hold, Cooking tools for a chef doll, or tiny toys you can sculpt to recreate your favorite memories, the possibilities are endless with polymer clay. Do an internet search for Polymer Clay Free Tutorials and your mind will be BLOWN!!  Check out the Polymer clay FREE TUTORIALS from Youtube...you might never come up for air, you'll be so captivated!! Here is my favorite polyclay miniaturist's youtube tutorial channel: 

FREE Polymer Clay Tutorials


Crochet Lace & Trim: If you know how to crochet, your dolls will open up an whole new crochet world for you. I like to use a single strand of embroidery thread to crochet a lacey scalloped edge for the bottom of dresses and skirts. I use a 1.25mm crochet hood (or smaller if I am using sewing thread) and make a chain long enough to wrap the circumferance of the doll area to be trimmed. 

Use any of your favorite crochet lace patterns to recreate in miniature with the thread. Just by downsizing the thread and the size of the crochet hook, you can use your regular yarn patterns and they will magically become miniscule!! But don't say I didn't warn you that it is a killer on the eyes!! I suggest using a good pair of manifying/reading glasses when you do miniature crochet.

I don't expect that this Toothpick obsession of mine will be leaving anytime soon, so I have plans for further explorations in Toothpick Dolls, Matchstick Dolls, and Mini Peg Dolls!  

Next project on the agenda: Matchstick Dolls :)

Be sure to subscribe to my blog so you don't miss out on all the FREE TUTORIALS!! Lets make this world a WHIMSICAL WONDERMENT...One Wonder-filled Craft at a Time!!!

With Sugarplum Hugs!!
Deanne

Please let me know what you think in the comments below and I would love to see your creations too!!