Tassel Dolls
by Deanne Crim ~ Crafty Crusader

I'm not a big scrapbooker, but I do enjoy crafting with paper and ephemera, however, its fragility always keeps me at bay for long term possibilities. For the idea spinning in my head, paper just wasn't long-lasting enough. You see, I like to create heirloom giftings that will last throughout generations, before succumbing to the 'decay' that life delivers, if I can make it happen. So I began to conjure ways to turn the paper dolls into real dolls.
Having played around with my computer printer and white canvas fabric previously, for a Vintage Valentine project, I knew that there was tremendous potential to create some incredible and personalized for special people in my life. Not only do my beloveds deserve to be immortalized in doll form for posterity, I needed a fun project to lift my spirits during this torturous 'quarantine' sweeping across the globe. What better way to distract my attention, than to create my own collection of dolls to play with?!!
Once I determined to get it done, I was on my way!!
First stop on the Tassel Doll project, was to choose images. I chose forward looking smiling faces, with enough upper torso that I could edit to create the upper half of the doll. The bottom portion would be purposefully blank, as there was no need to waste printer ink when the area was to be covered with trimmings.
My favorite FREE ONLINE photo editor is Lunapic where you upload your photo image and then use their tools to 'erase' backgrounds and other cool editing options. I use this website for many of my craft projects, and find it invaluable, especially being free!! Once you create a vector image (no background) you can save the image file to your own computer for future use.
Then I created a regular ol' word document (because I don't own a photoshop program...I'm not sure why?) and I uploaded the doll images onto each page with as many as would fit comfortably, making sure to leave space in between for sewing/seam allowance, and be sure to add room at the bottom of each doll approximately the same length as the upper body, to create a lower body. Nothing fancy, just enough space to add a few inches below the image in a softened triangle or rectangle shape (that will later be covered with trim and embellishments).
Then I created a regular ol' word document (because I don't own a photoshop program...I'm not sure why?) and I uploaded the doll images onto each page with as many as would fit comfortably, making sure to leave space in between for sewing/seam allowance, and be sure to add room at the bottom of each doll approximately the same length as the upper body, to create a lower body. Nothing fancy, just enough space to add a few inches below the image in a softened triangle or rectangle shape (that will later be covered with trim and embellishments).
After preparing the images it was time to cut white canvas fabric (you might also be able to use silk or muslin?) to the size of a standard letter size paper that would run through my printer. I used lightweight canvas fabric, not too stiff or it would fight with me while sewing the doll later.

(This canvas fabric works wonderfully!)

(This is my Epson printer...nothing expensive or special, just a regular home unit)

(Initially I used the double-stick tape procedure, which ended up being unnecessary for me)
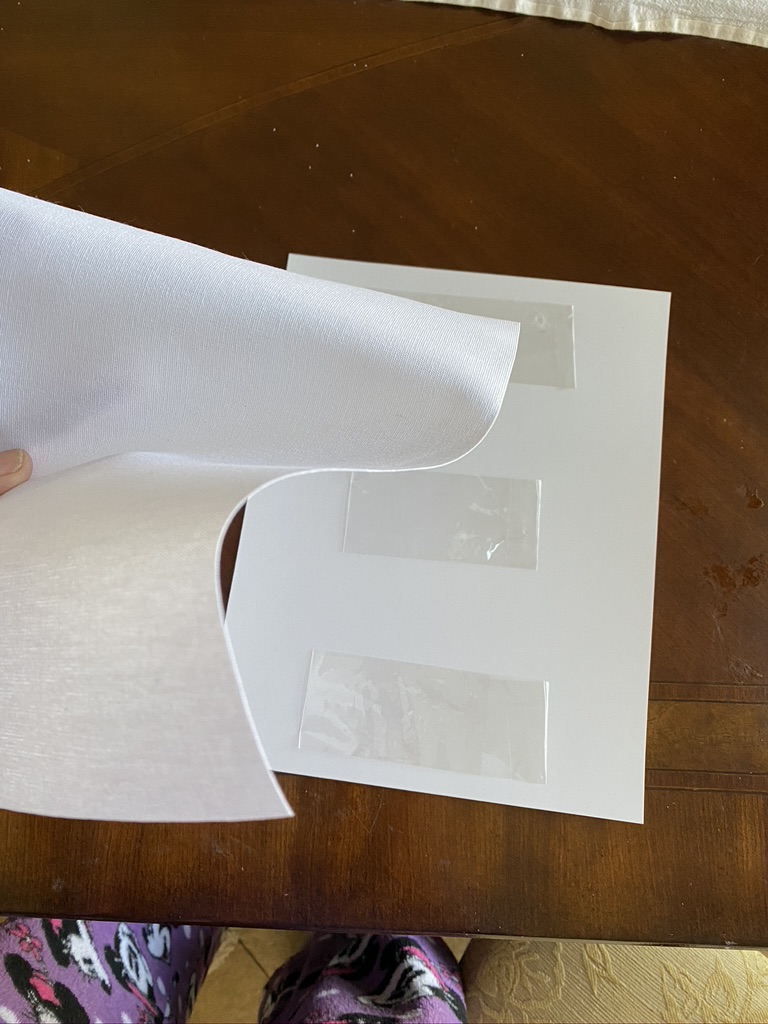
I did a test run to make sure the fabric would go through the printer smoothly and not jam, by using double-stick tape to secure the fabric to a piece of card stock. It printed well. For the next one, the fabric slipped off the card stock and went through the printer by itself, and worked PERFECTLY!! So I stopped wasting double-stick tape, and started feeding the fabric directly into the printer. *If you plan to use silk or a lightweight fabric, I suggest using the double-stick tape method on card stock to insure you don't ruin the fabric and jam your printer.


(This image is actually Vintage Style Fabric Valentines printed in the same manner)
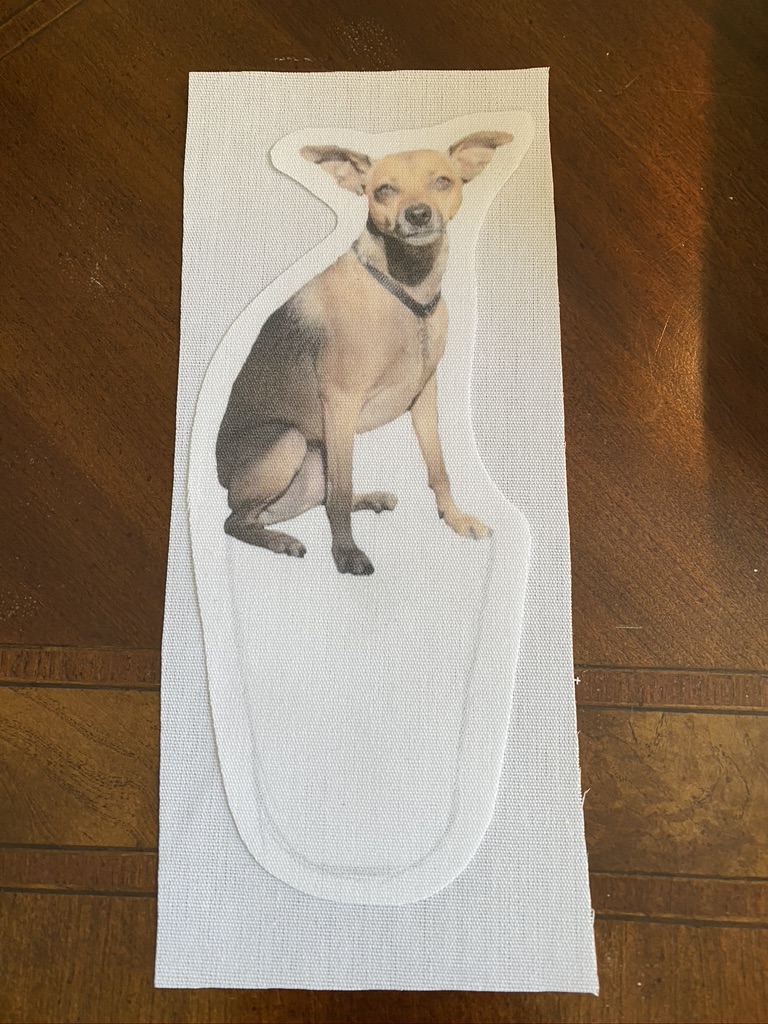
Once I had my stack of doll faces/bodies printed onto fabric, I used a light pencil to draw an inverted soft triangle type shape to indicate the lower body. This is where the trim, lace, ribbon, and braids will be attached, so you don't want a sharp angle to the shape, just a gentle sloping taper. Then I cut out the image/shape, leaving a 1/4" edge extending past the image, where the embellishments will ultimately be attached.


(Who says Tassel Dolls have to be people? This is Koufax the Wonder Dog!!)
Using the cut-out image as a guide, I cut a similar size piece of luxe upholstery fabric for a decorative back. (Initially I planned to use the canvas fabric as a backing, but later determined that decorative upholstery fabric was a better choice, so my examples do not show the luxe fabric...oops!) I intentionally planned NOT TO TURN the pieces after sewing, because I didn't want a thick seam allowance to distort the shape, so its an easy process.
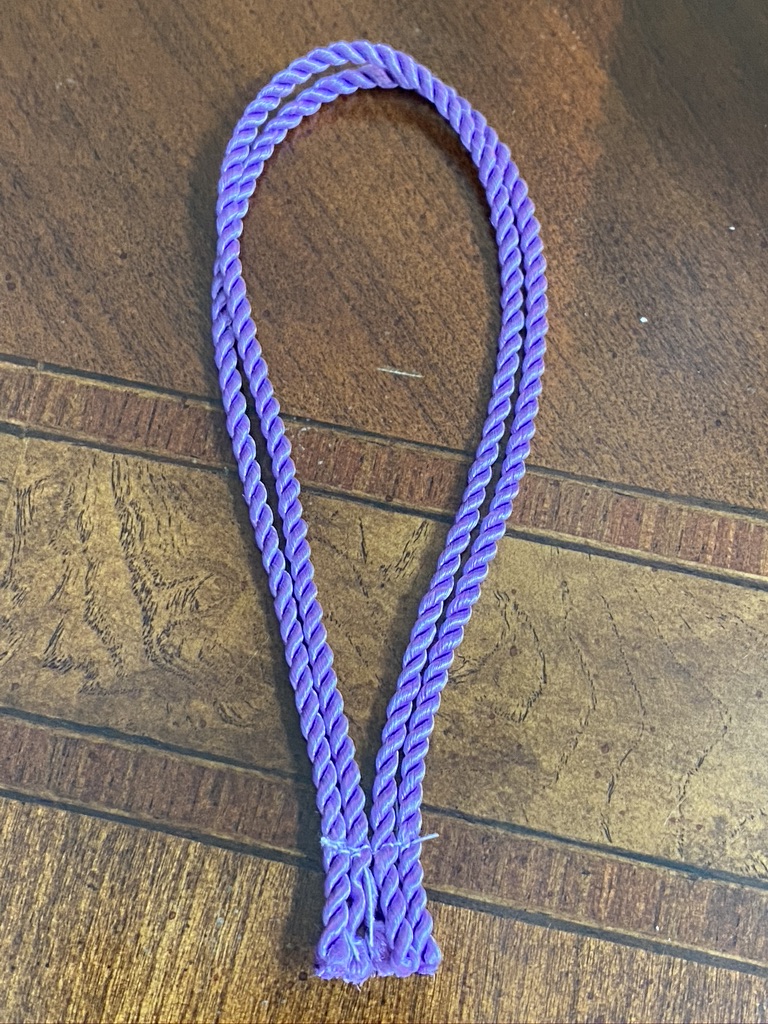
If you plan to attach a hanging loop to your doll, now is the time to cut a piece of cording or ribbon, as it should be sewn into the doll assembly as you attach the front piece to the backing, for a secure attachment. You could also attach a hanging loop later with adhesive, but I like the idea of it being sewn into the structure. I chose to use two pieces of narrow twisted satin cord as a hanger, approx. 8"-10" long each. Form the cords into a loop; stitch along raw ends, then sandwich in between the front and back pieces at the center top, for balanced hanging.


Insert the cord/ribbon hanger in a loop shape (pin in place if necessary), catching the ends within the stitching line as you attach the front fabric to the back fabric. Using my sewing machine, I stitched around the perimeter of the photo image as well as the lower body shape, WITH RIGHT SIDES OUT, making sure to LEAVE A SMALL OPENING to stuff (I forgot this part the first time and needed my trusty seam ripper...ugh!) If there is a sharp corner or shape in the image, I try to soften it into a smooth curve with stitches, so the final product is pleasingly shaped with stuffing inside. When it comes to dog ears, you've got no choice, though! *This could also be sewn by hand, I just took the lazy way!!

After stuffing the shape, but not too full, sew the opening closed.

(They look partially naked here, I apologize!! haha)
Now its time to have some fun!
Note: On the first batch of Tassel Dolls, I used the same white canvas fabric for the back, making it necessary to embellish the white emptiness with lace medallions and other decorative textures. I glued the lace fabric in place, avoiding the large open net areas.

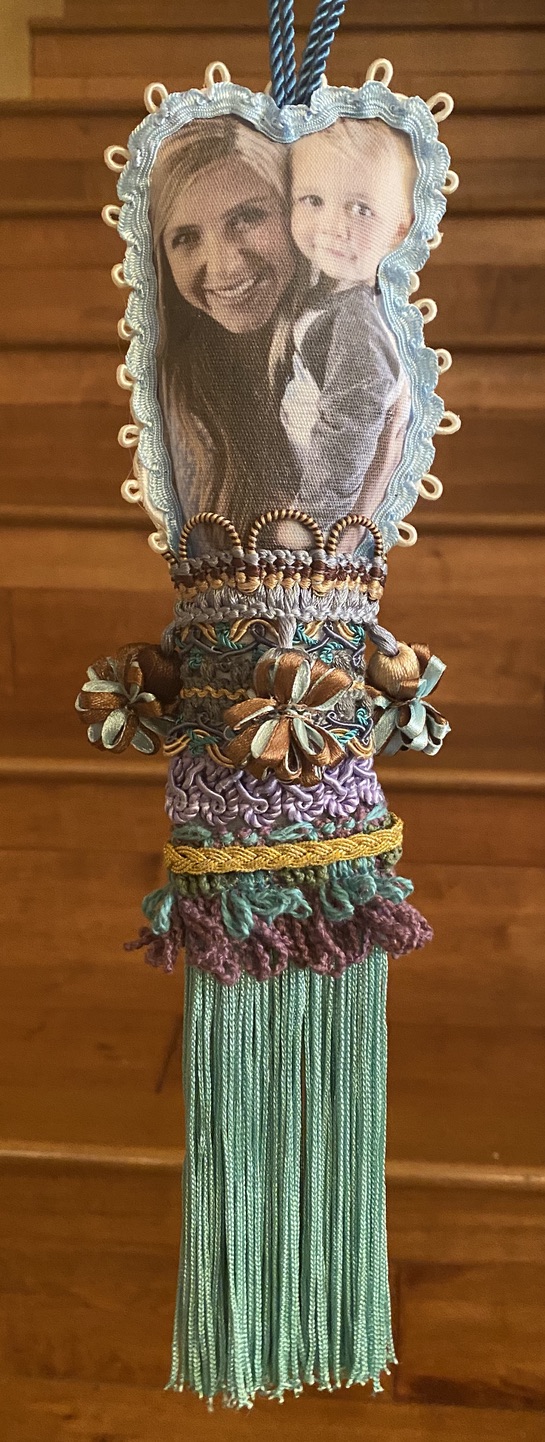
The next step is creating the decorative border around the doll image, as well as on the back side (to hide raw edges). I used narrow frilly trims, floral shapes, glittery tinsel, Furry yarn, anything I could find that coordinated or contrasted with the image and the color scheme, to create a whimsical effect.
Again, using E6000 adhesive, I attached the trim, pinning it into place until the adhesive cured. *Note: You will want to remove the pins within an hour or so, otherwise you might find yourself with pliers trying to extract the glued pin!! (I know because I did it!)
Again, using E6000 adhesive, I attached the trim, pinning it into place until the adhesive cured. *Note: You will want to remove the pins within an hour or so, otherwise you might find yourself with pliers trying to extract the glued pin!! (I know because I did it!)


(In this first batch, I attached trim all the way around the doll, but soon discovered that it
was not necessary to trim the lower body, which ends up being covered by embellishments)
Next comes the fringe bottom. I hoard...I mean 'have' various lengths of fringe and planned according to the size and shape of the dolls. Some beckoned for long fringe, others wanted just a short jiggle! Using E6000 adhesive...(I should buy stock in that company for all the product I purchase from them!!), glue a section of fringe around the lowermost edge of the body, wrapping around both front and back, then going around again for a second layer, creating a full and flouncy tassel base. Pin in place until the adhesive dries.


I already know what some impatient crafters are thinking...
"Why do I need to wait for the glue to dry, can't I just use a glue gun that dries immediately?"
My answer is an emphatic "NO!!! Absolutely NOT!!"
Please do not ever use a hot glue gun for your heirloom crafts, I beg you!! I have personal experience with the heartbreak of glue gun fails, and it goes way deeper than just burning fingers. Glue gun assembled crafts DO NOT STAND THE TEST OF TIME!! They fall apart when hot weather turns to cold, and back again, and over time the glue goes from soft and grabby to cold and let-goey!
As an artist, my intention is to create long-lasting remnants of my creative journey, whether for my personal enjoyment, or as gifts for my kids, family, and friends, and especially for items sold to customers ...which means it needs to survive or your reputation is kaput! Glue gun adhesive is subject to weather conditions and there is nothing as frustrating as pulling out a cherished work of 'heART' from a storage box, only to find it has disassembled itself in the cold to hot to cold weather conditions of life...I know, because it happened to me and I was not happy about it! A total loss...thanks to glue gun assembly, so I haven't used a glue gun in over 20 years...True story!
Beautiful embellishments, and vintage trimmings are my jam. I have boxes and boxes and BOXES of hoarded stash that I have collected over the past 35+ years. Its the same with beads, but don't get me started, thats an obsession for another day!!


(Yes, my dining room table is a HOT MESS!!)
Finding a worthy use for my collection of exquisite trims is is what further fueled me to create these one-of-a-kind dolls. Some of these embellishments have lived in my boxes for 25+ years and I am thrilled to be using them in such a magnificent way!!

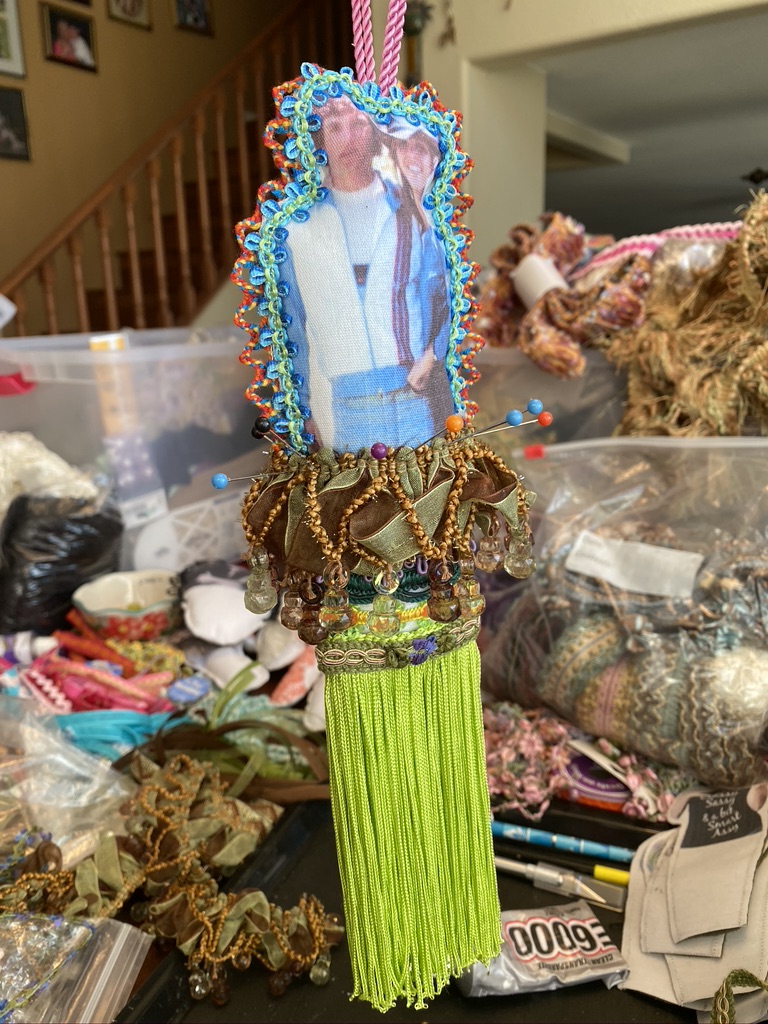
I continued to add rows of trim and embellishment, pinning in place until cured, digging through my many choices with color schemes and themes in mind, using my trusty E6000 to give them permanent residence on my Tassel Dolls. I must admit, I am overjoyed with the results!


Initially, I intended to get a head start on holiday giftings so I would be well prepared when the time comes, but once I finished these TREASURES, I am now suffering to get them off my table and into boxes to 'go home'!! I may have to enlist "Christmas in July" activities to soothe my impatient gifting soul?!!

(You can see here that some of the fringe was wonky and wrinkled...no problemo! Just get it damp and hang to dry, but make sure NOT TO GET YOUR IMAGE WET as ink may not be waterproof!)


"What on earth would people use these for?" you might be wondering...
Those who know me well, already know the answer...use them as EYE CANDY to make people smile!! Hang them where they will make YOU smile...where you can pick them up and make them dance! Anywhere you want be reminded how much you love someone! Put them in eyesight of visitors to your home, who will want to touch and play and explore! Hang them on your cabinet pulls, door knobs, and furniture handles for an added dose of whimsy throughout your home!
One of my favorites is the Tassel Doll I made for a new friend of mine, Carla Zmr. We connected unexpectedly through a Facebook craft group, and our Hawaiian connection bonded us immediately. I attended college, met my hubby, and lived there for 4 years, and have a deep connection to the islands. As it turns out, Carla's mom was a professional Hula Dancer for many years, and had recently passed away. She was heartbroken and inspired by a tropical hula necklace I had made, and reached out to me. To make a long story short, her mom seems to visit my heart, and inspired me to make Carla her own Tassel Doll, Hula style, using an old Hula photo of her mom. I haven't sent it off to her yet, and hope the surprise won't be spoiled by this blog post, but to be honest, I had to request the photo from Carla for the project, so she knows sumpthin is coming! Carla, if you see this first...SURPRISE!!! And I couldn't resist making one of her mom and dad in a more recent photo...I thought her dad might find comfort as well, and I'll let them fight over who gets which one!! <3

I hope you have enjoyed this tutorial and are inspired to create your own unique Tassel Dolls! If you do, I would love to see what you come up with! We each see the world through a prism of unique colors and ideas, and I am always intrigued and honored to see what my art inspires in others! You are also encouraged to share thoughts and questions in the comment section below, I would love to hear from you!!


