
My pom pom crafting adventures continue with one of my favorite loves of all time...Cuddly Teddybears!
My former experience with teddybear making involves 30+ years of making original designs of miniature teddy bears that replicate vintage style toys. They were my obsession for nearly two decades, but as my eyes began to betray me, my crafting projects increased in size. Though I still adore making miniatures of all kinds, these big fluffy fellows capture my heart in a whole new way!
Grab your Clover® pom pom maker tools, and lets get started!
As with my other free pom pom making tutorials you can use whichever size tool, depending on the outcome you want.
Head:

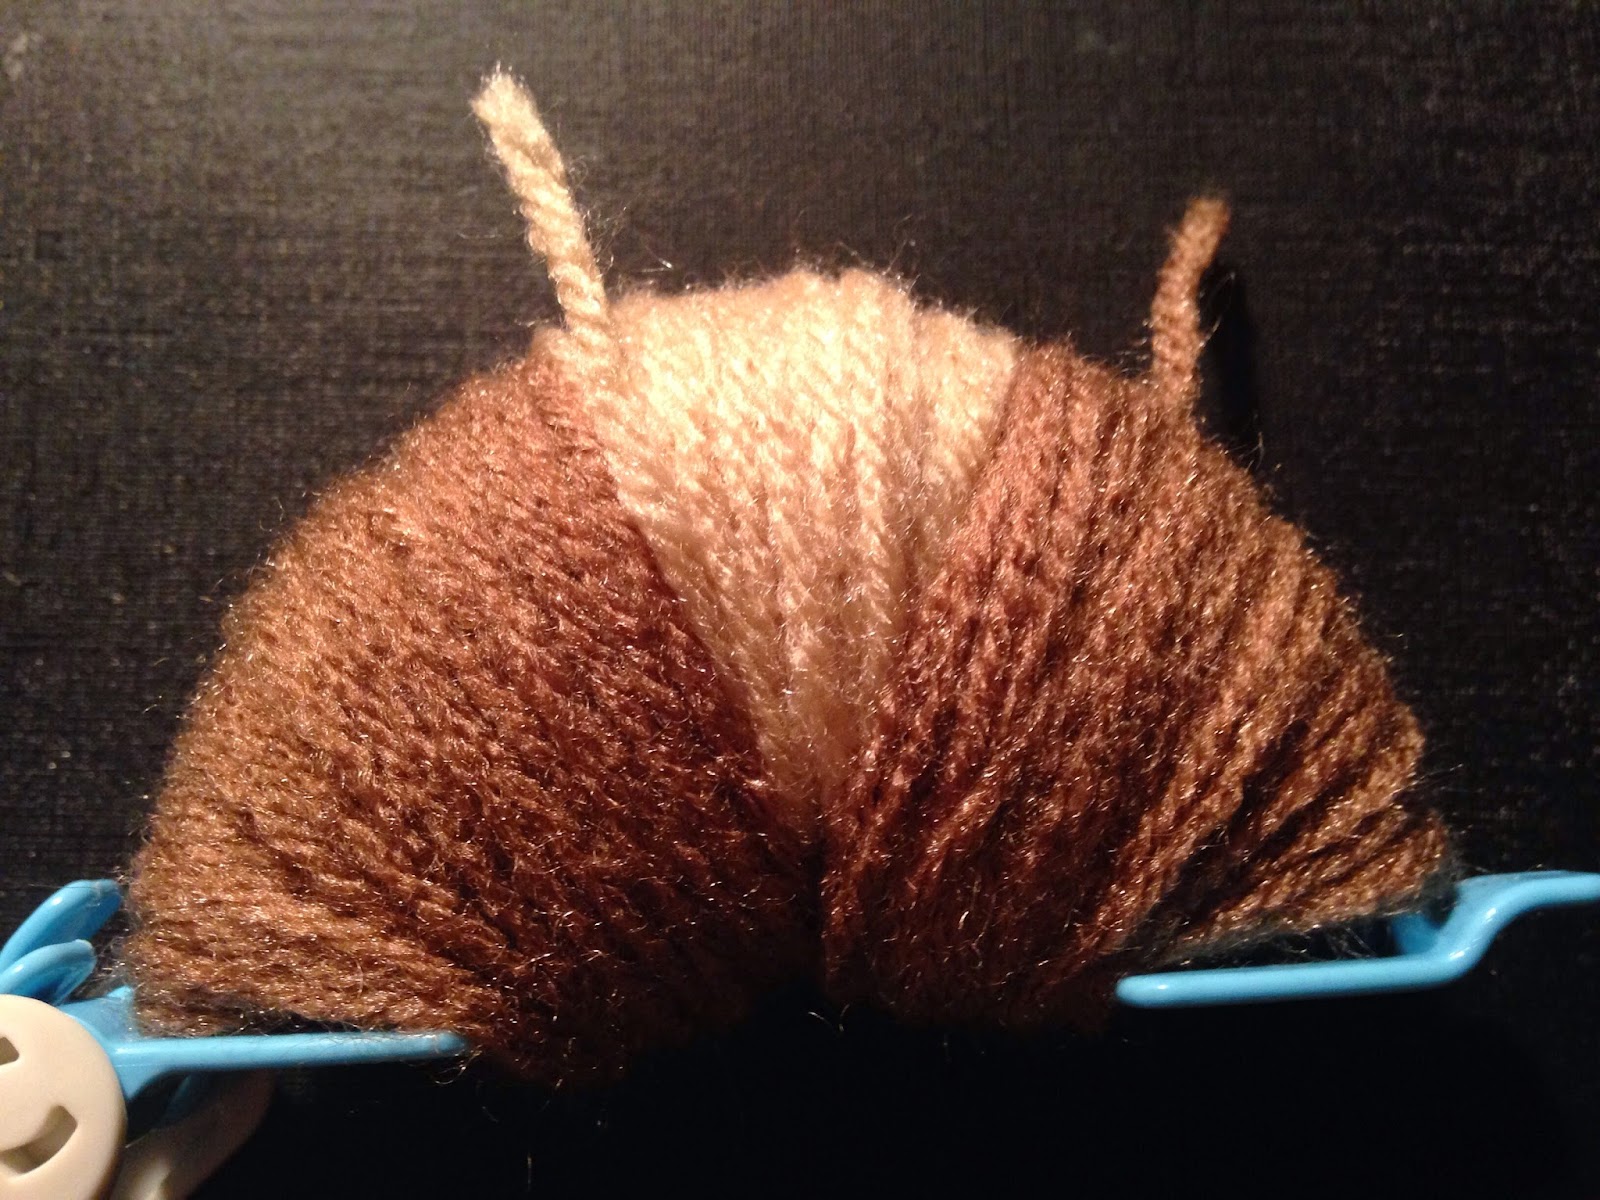
Using the Clover® 2-1/2" pom pom tool, wrap the center portion of one half of the tool with light brown/tan yarn as pictured above with 10-20 wraps (this will be the muzzle area of the bear face).


Using brown yarn, wrap on either side and over the tan color completely, covering completely to fill that half of the tool.

On the opposite half of the Clover® pom pom tool, wrap halfway full, then using a pen or pencil held against the upper part of the wraps, begin to wrap 20-25 times around the pen/pencil.

Repeat this process on the other side (see photo above) to create a large loop effect (this will be what you use to create the ears).

Remove the pen/pencils by sliding out of the loops and close the pom pom tool. (see photo above)
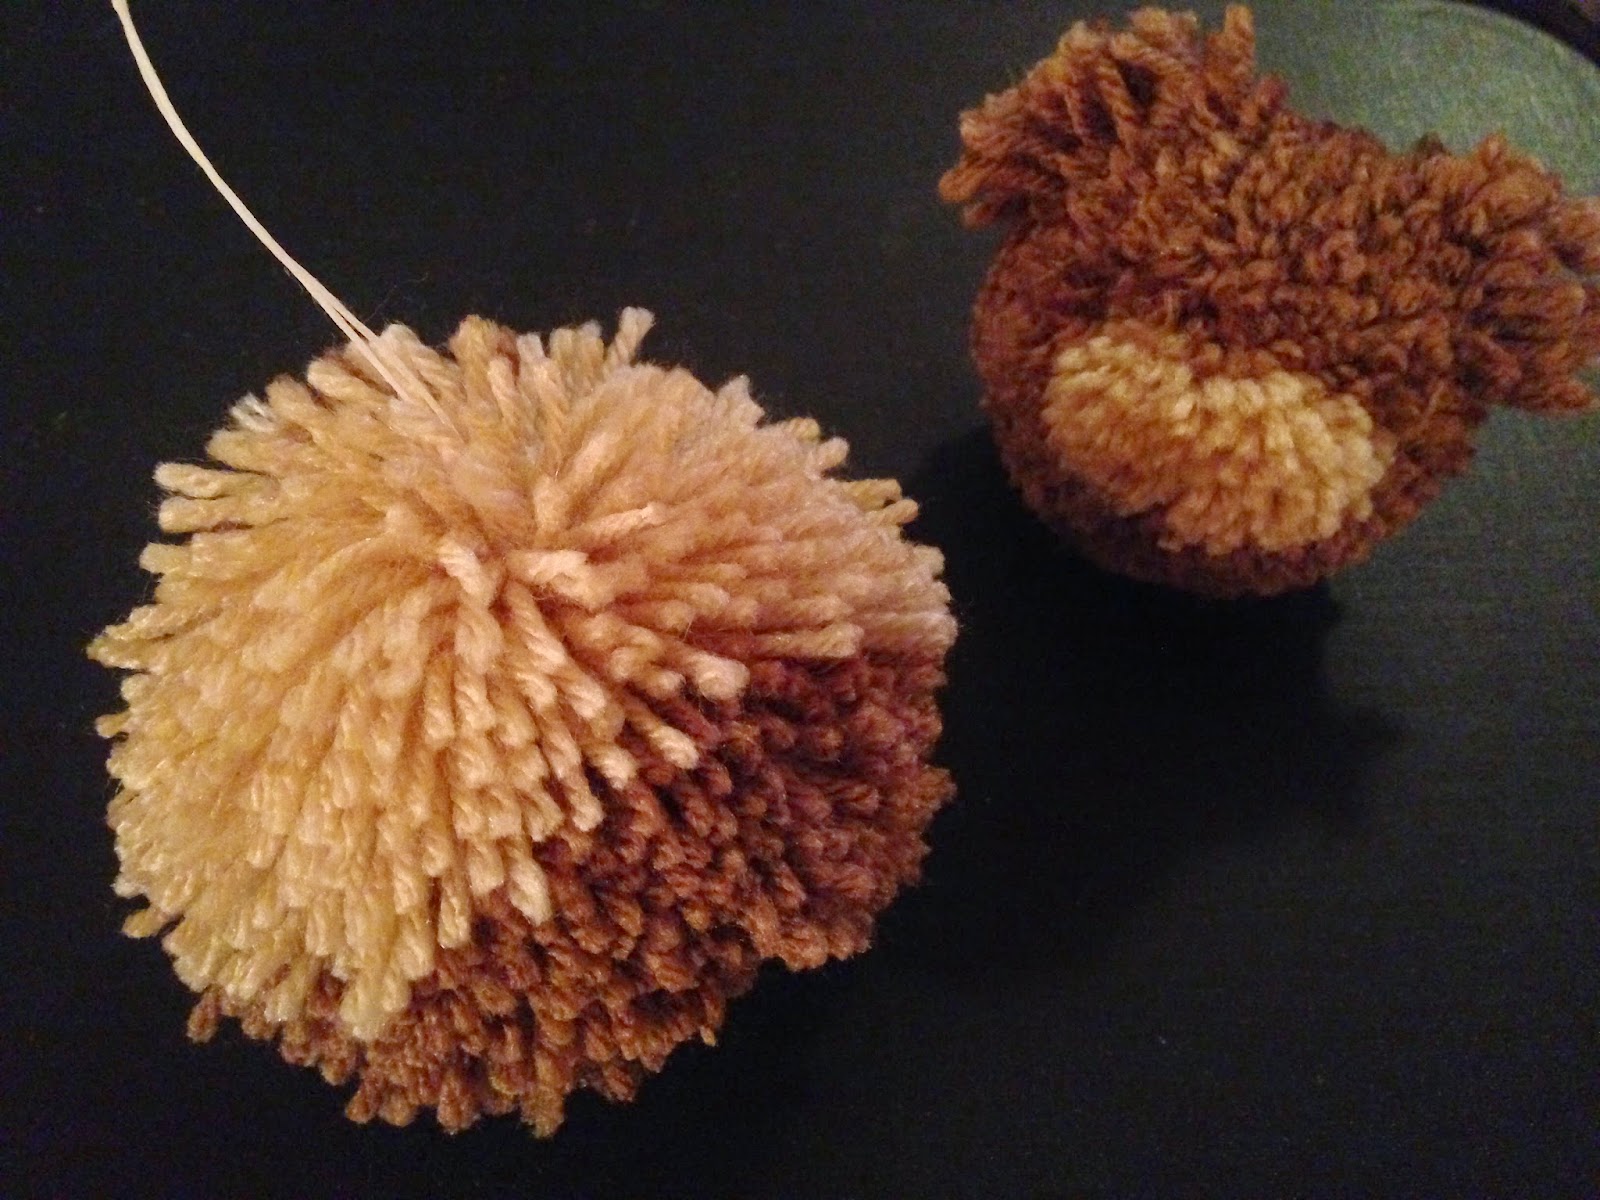
Trim pom pom from tool by cutting through ends, as described in package instructions, and remove.

It isn't exactly a lovely sight, now is it? But don't give up yet!!

Shape the head by trimming with your sharp scissors carefully and slowwwwly! He can't grow his fur back so only trim what needs to go! In the beginning, try to avoid the tan muzzle area as this should be left longer to protrude out from the face, giving it nice shape.
Start trimming around the outer edge of the muzzle, forming the indentation that shapes the face and gives you a place to set the eyes in naturally. Trim the ear yarn into a half circle shape as best you can. It isn't fabric, so there is a lot of hand fluffing and shaping you need to do to get the proper shape, but once you get the hang of it, its a breeze! And it satisfies that craving to cut your dolls hair!! ;)
Body:
Wrap the center of one half of the large Clover® 3-3/8" pom pom tool with tan yarn, with dark brown on either side of it to fill the entire tool.

Wrap the other half of the tool with dark brown.

Trim ends of loops wrapped in the Clover ® pom pom tool, as described in package directions.

Tie pom pom to secure, using strong waxed thread (the wax helps to grab and tie the pom pom snugly without having the knots slip). *You can also use strong carpet thread.

Remove pom pom from tool and shake out, using the thread ends to shake and fluff it up


Hold pom pom in one hand as you trim into an oblong shape, rolling it around in your fingers, looking carefully at the shape as you trim, trying to maintain balance and a smooth shape.

The tan area is the front of the teddybear's tummy. You can keep it longer and fluffier or trim perfectly in line with the rest of the body, its your choice!
Arms & Legs:

Using the small yellow Clover® 1-5/8" pom pom maker, make
8 dark brown pom poms for the arms & legs. *You will trim the arm pom poms slightly smaller then the leg pom poms.


Trim ends of loops along tool edge, tie with waxed cord to secure, and remove from pom pom maker.

Paws:

Using the pink Clover® 1-3/8" pom pom maker, wrap the center with 8-10 wraps of tan yarn, then wrap to either side of the tan with dark brown.

Wrap the opposite side of the pom pom maker with dark brown.

Fluff pom pom using thread ends to shake it out.
Trim into nice round shape, making the "hand paws" slightly smaller then the "foot paws". (I made mine slightly oval)

Here are your line-up of parts, ready to be assembled!

And here is how they look in place where they will be attached.
Joining your Teddybear:

I decided to use doubled yarn to join my teddybear together, but you could also use strong carpet thread. The yarn won't be nearly as strong, but I was making this more for decoration then for playing as a toy, so I felt the yarn was good enough.
Attaching Head & Body:

Starting at the center top of head (between the ears) take needle & yarn through the center of the head and out through the bottom of the neck, then go into the center top of the body, coming out through the center bottom. (see photo above)

Pull snugly even though it looks like your scrunching the head, (you'll have plenty of time to adjust and loosen him up!)
Take the needle and yarn back up through the body to the top of the head, and then back down through the center of the head again (to secure) but this time when you come down through the body, take the needle to the side of the lower body, to attach a leg.

From the lower side of body, take needle through two of the "leg" pom poms, and then through a "foot paw" coming directly through the center bottom of the tan color; then take the needle back up through the "foot paw" and leg pom poms to the upper body, pulling snugly to form a solid leg...but don't pull Superman-strong cuz you don't want to break the yarn...experience is telling you this!

From the lower leg, take the needle up through the body at an angle to the opposite side "arm" area. Take needle through two arm pom poms and then through the "hand paw" directly through the center, coming out of the tan area. Then go back up through the "hand paw" and both of the arm pom poms towards the upper body, pulling in snugly to create a solid arm.
Take the needle & yarn through the center of the body to the opposite arm area and repeat the process, adding two arm pom poms and the "hand paw"; then go back up through the paw and arm poms pulling snugly to create a solid arm.

Take the needle back through the body at an angle to the lower side of the body to complete the opposite leg. Attach two leg pom poms and then the "foot paw"

Take the needle back up through the "foot paw" and each of the leg pom poms, pulling snugly to form a solid leg. Then take the needle back through the body to one of the upper arm areas (but not through the limb again), just go through the "arm pit" area then come back through the body to the other "arm pit" area. This will secure the attachments for a solid connection, as you knot off and trim the ends, hiding it in a discreet place such as the arm pit area.
*Don't worry if you notice frayed areas that need trimming. You can finish all the grooming once the bear is done, so don't fret!
Facial Features:

To create the nose, take doubled black yarn in the needle, with a knot at the end; go through the back center of head, hiding the knot in the middle, pulling through the center of the head to the top of the muzzle area and trim with the yarn ends sticking out slightly, to be trimmed later.

Repeat this process 3 or 4 times (or until you have as big of a nose as you want), each time knotting the doubled yarn and pulling through from the back of head, hiding the knot end in the center, then trimming the ends.

Don't worry about it looking like a mess...Trimming it up will take care of everything, I promise!
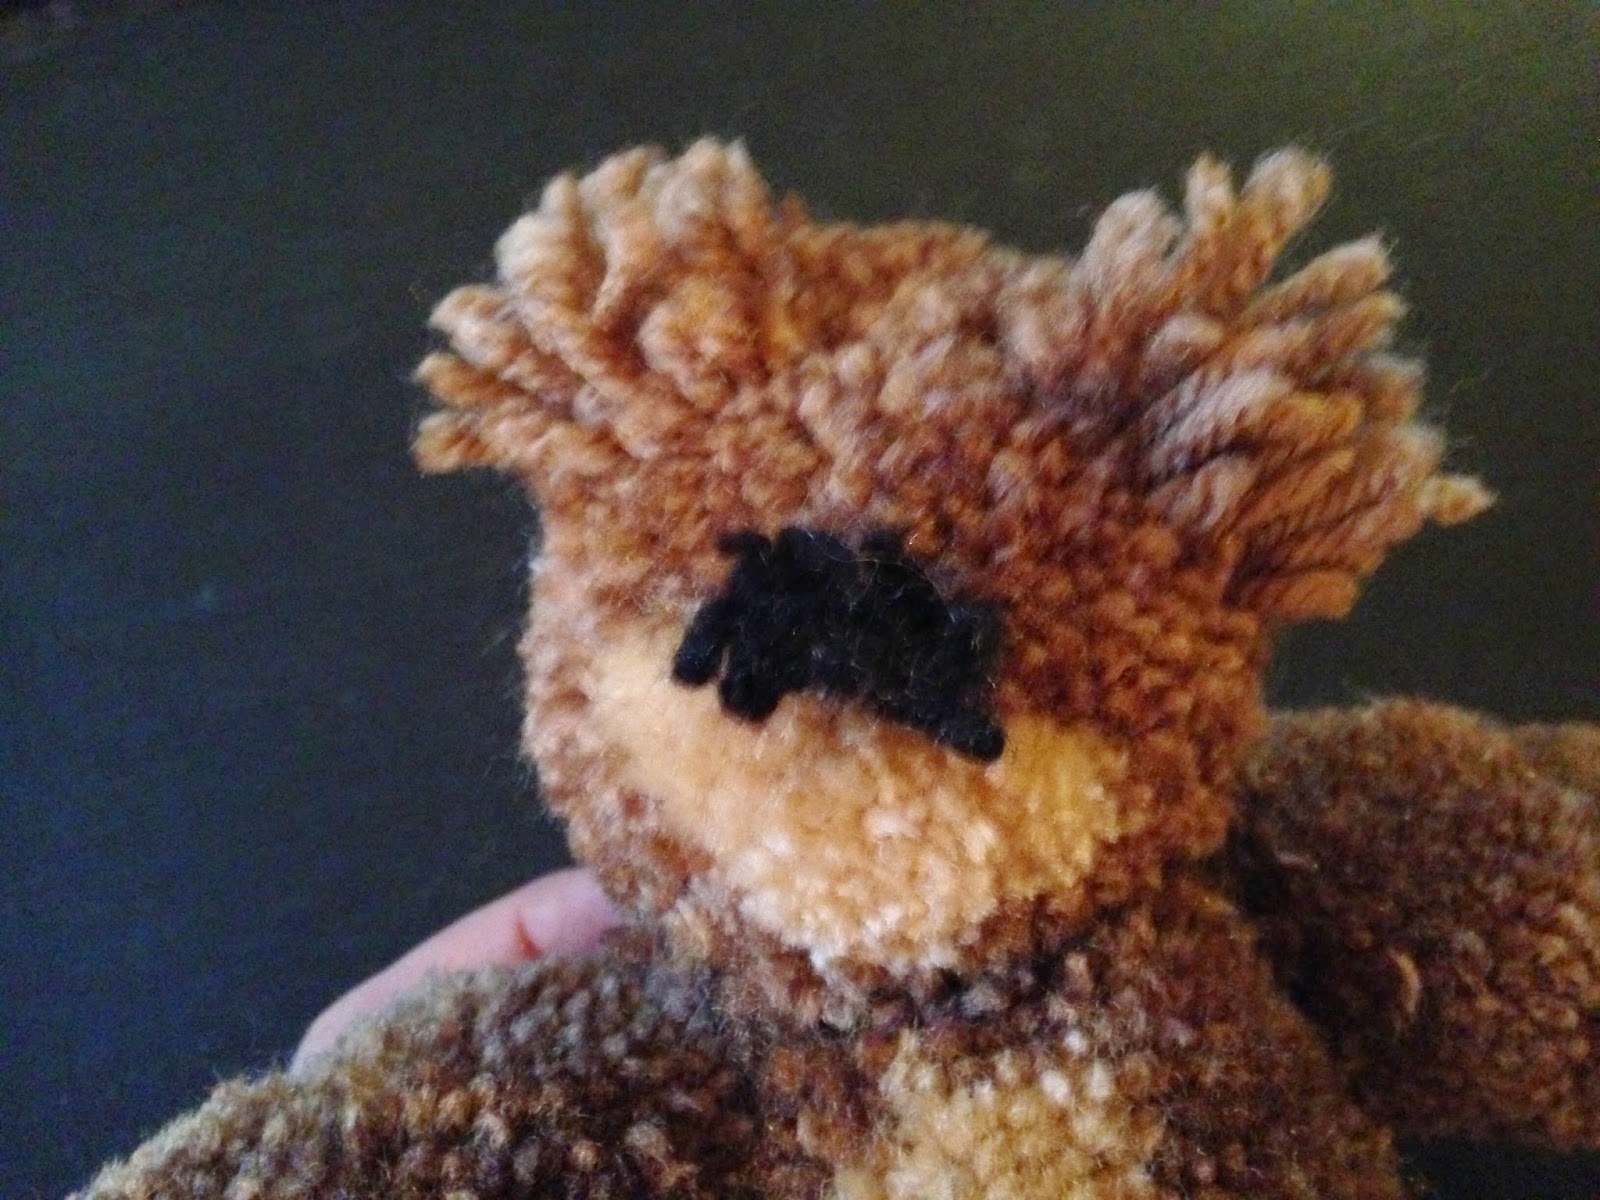
You might think this is too big?

But you can see as it starts to get a haircut, things are coming together rather nicely...

I think we have lift-off!
It looks pretty good to me, what do you think?
Eyes:

As with all of my pom pom creations, there are many options for your eyes. If I am creating a work of heART or a gift for older children and adults, I like to use my Faux Glass Polymer Clay Eyes (Free tutorial: Here) but they aren't a good idea if you are giving your creations to small children, as these eyes are glued on and could be a choking hazard!!
To be safe for young children, you can make eyes using glued layers of colored felt cut into circles for eyes, which would be the safest choice. For older children you can attach beads by sewing in place with sturdy carpet or craft thread.
As for me...I am in la la la LOVE and have returned to my childhood with this special pal who will keep all my secrets!!!
I hope you have fun making your own Pom Pom Teddybear!
And don't limit yourself to classic colors, you could make a fantastical Rainbow Teddybear...a Sassy Panda...a Sweet Polar Bear...a Pastel Baby Bear...Your imagination is your only limit, so...
GO FOR IT!!
I've got your back!!
Wishing you all the Creative JuJu you can hold!!
With Sugarplum Hugs,
Deanne
PS. Leave a comment to let me know how you're doing and what you're working on!
I came acros SUGARPLUM VILLAGE 0n PINTEREST. Its's right up my alley. Will be working on your TEDDY BEAR SOON. THANK YOU Janice Perry
ReplyDelete