
I have a "thing" for bottles and jars. I'm not sure if its the glass, or the fact that its a container, but whatever it is, its an obsession, and I'm on my way to needing a 12-step program to get over it! My husband thinks they are multiplying and I can't say that he's mistaken?
The reason I collect so many bottles and jars, is because I can think of a gazillion things to make, using them as the foundation. I hate the idea of stuffing a land-fill with perfectly good jars! Not only do I feel guilty, but I feel as though I am wasting a genius product. Enter, the jar obsession! lol
So, when I made Chicken Picatta the other night, I used an entire miniature jar of capers...I hadn't even emptied the contents of the tiny jar before the crafting ideas started to flood my mind. "I have got to make something wonderful with this adorable tiny jar..." my mind began to conjure.
With a stash of rhinestone chain, and a full tube of E600 glue, I began to form a solid plan...
SUPPLIES:
Glass jar or container
Rhinestone Chain in various sizes and colors
E6000 glue
UV resin
(or ICE® resin, Glossy Accents® or other glaze)
Strong Scissors to cut rhinestone chain

1. Starting at the base of the jar, squeeze a small line of E600 glue around the base, all the way around the circumference of the jar, cut rhinestone chain to size when you get close to the end of the "round" and can estimate the ending point. Make sure that the first row is setting evenly on the bottom of the jar to assure the level lines up the jar as you go. You can rest the jar on a table and use the side of your scissor blades (or a straight edge of some sort) to gently press along the top of the rhinestone chain to make sure it is level with the table top).
*Tip: I use Dollar Store scissors that I purchased for $1.00 that cut through the chain backing easily, and I don't have to fret about ruining good scissors!
*Tip: Be sure to cap your glue asap so you don't lose too much...as you know if you use E6000, it likes to "ooze" out after you have squeezed your amount, so be quick!

2. Squeeze a thin line of E6000 above each row you have just completed, and carefully add the next line of rhinestone chain. I did the first two rows and then let it dry for 10 minutes to secure in place. (You can continue without allowing to dry, if you are very careful to keep the rows aligned straight)

3. Depending on the shape of your jar or bottle, you might encounter waves and dips in the shape of the glass. In my mini capers bottle there is an indent of the glass at the top before the screw neck top. I used smaller diameter rhinestone for this area to accent the shape even more. You will find yourself playing with colors and sizes to come up with the most pleasing results. There is no wrong way to do this!
4. If you want to embellish the bottle even further, you can glue vintage brooches or earrings on top of the rhinestone chain to create lovely focal points. Use your imagination and let it run wild!!
5. My capers bottle had a nice small lid which I covered with rhinestone chain in the same way I did the jar, being careful to keep the bottom row level along the edge (you can place it on a flat surface to help, if necessary). I continued glueing more rows of rhinestone chain, leaving the very top of the lid empty, to add an image later.


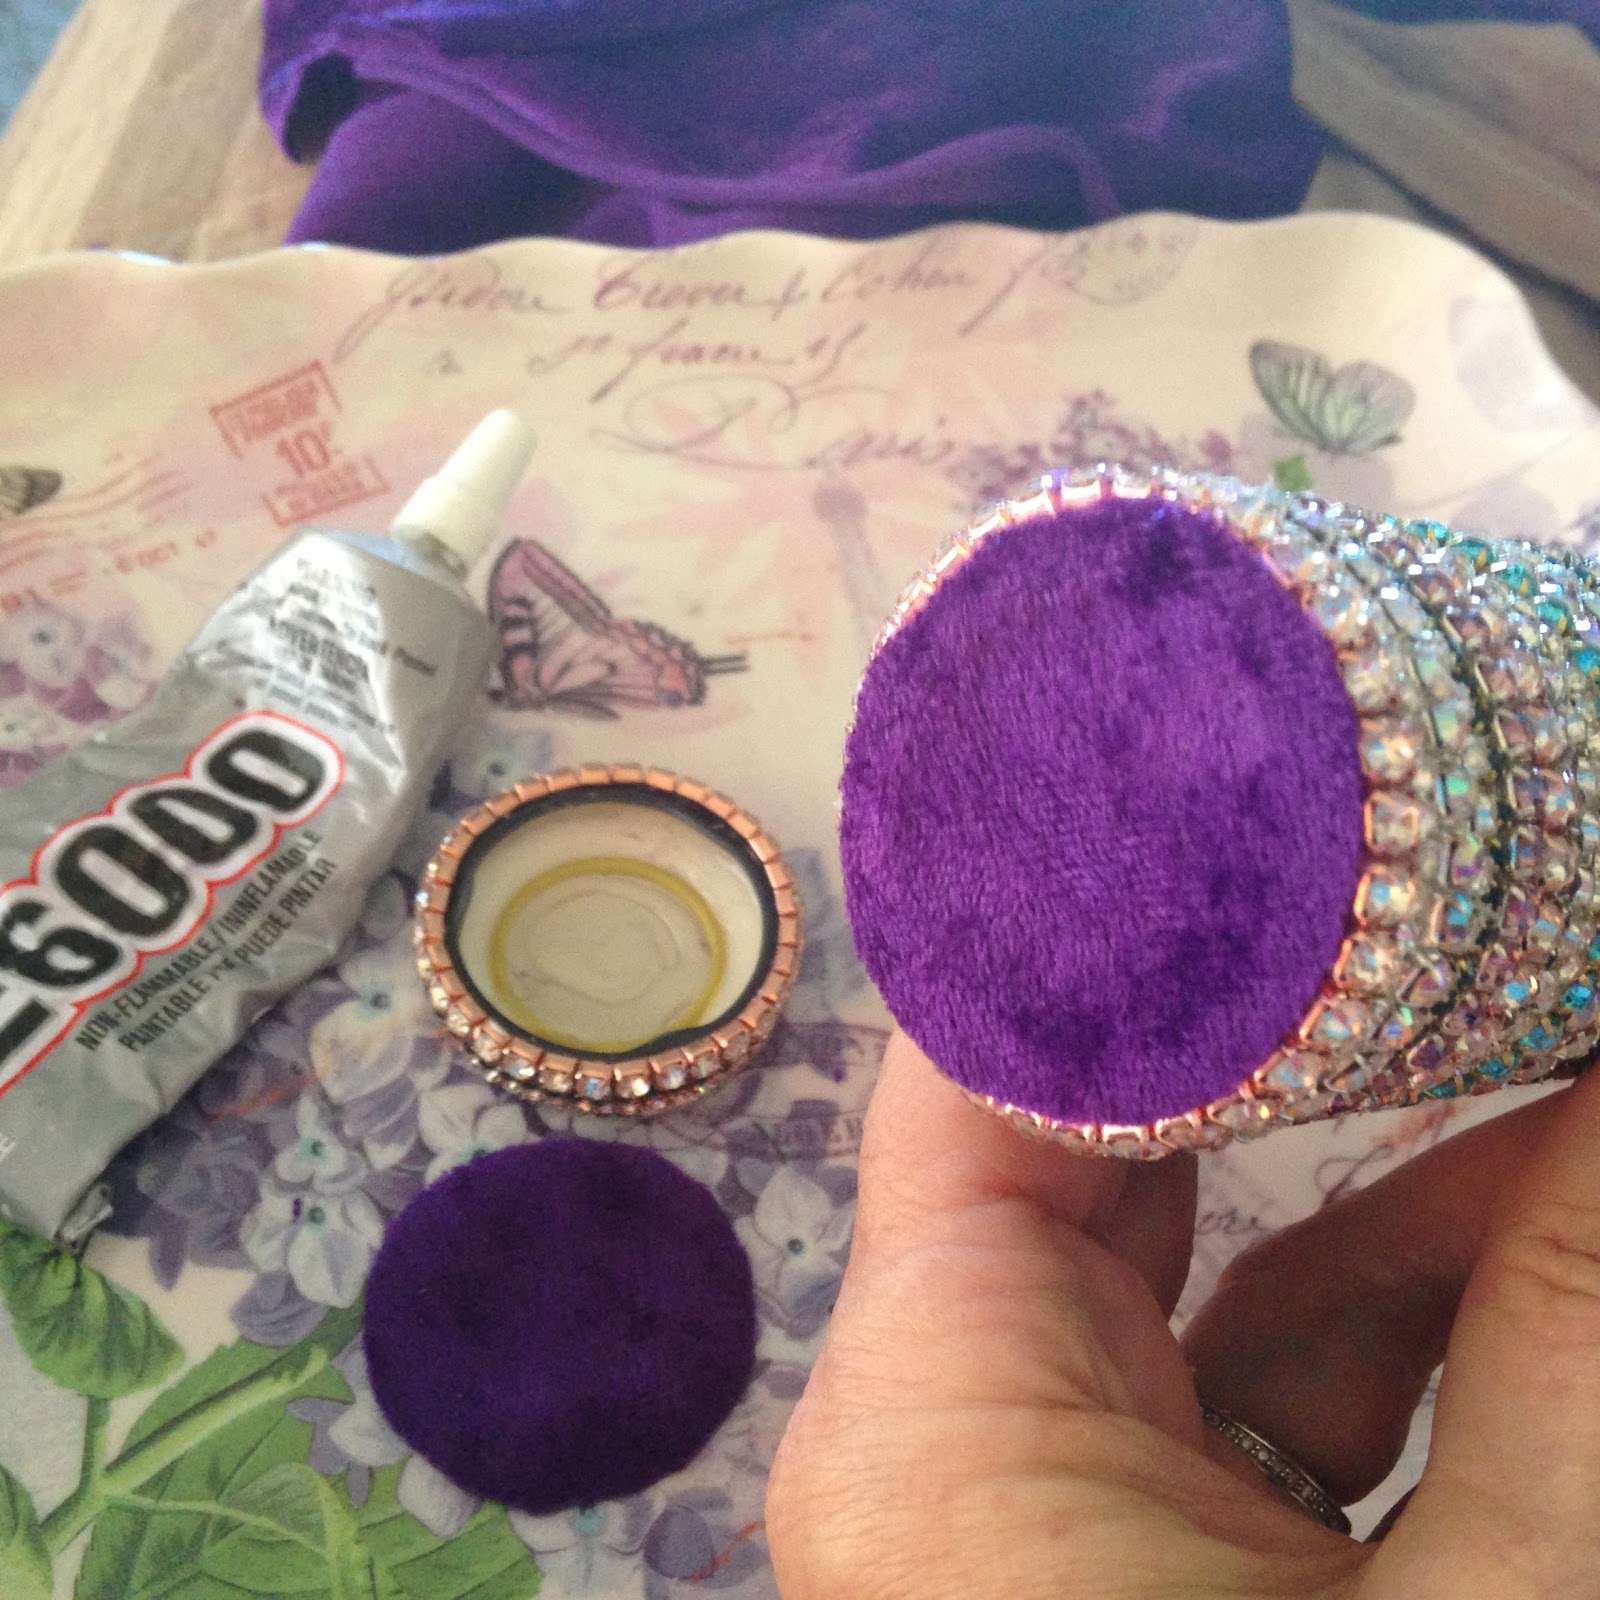
(bottom of jar)
5. Using a small scrap of velvet, cut a circle to the size of the glass base of the jar. (When I do this next time, I will trace the base onto the fabric BEFORE I glue the rhinestone chain in place!) I did the same thing with the inside of the lid.

(My circles aren't exact but are close enough to get the job done. Tracing before decorating the bottle would have been much easier!)

6. I used E6000 to glue the fabric circles to the jar base and lid, but you can use Fabric-Tac® or Aleene's® Tacky Glue for this part if you prefer. The E6000 has a tendency to bleed through the fabric, (which mine did slightly) so the other glue variations may work best for this application.

Tip: Don't be like me and forget to thoroughly de-stink your jar! I washed my caper jar, but didn't smell it to make sure it was fresh smelling...so I spent time carefully de-odorizing it with soap after it was finished...not exactly the best order to do things, so use your smarts better than I did!

7. I cut out a small image (lovers by a swan lake) that I found on the internet...(if you don't plan to sell your items you can "borrow" images by right-clicking on an image and "save as" to your computer)...if there are copyright images, you cannot sell them without permission from the image owner.
*Tip: I printed the image (from my computer) onto glossy photo paper, because it holds up best with the resin. Regular paper, cardstock, stationary & magazine print images need to be sealed with Mod Podge® (or another sealing medium) in order to protect the image from absorbing the resin and looking yucky!
8. After gluing the image securely to the top of the jar lid, I added one more row of narrow rhinestone chain to the top of the lid, gluing it carefully in place to encircle the image and hide any irregular edges around the circle.


9. If you haven't yet discovered UV Resin, here it is in all its glory! I absolutely love this stuff!! Lisa Pavelka's Magic Glos® is one option and in my opinion, it is a crafters dream come true! Though it can be a somewhat pricey, you don't need very much, and you can buy it in small quantities. It cures in direct sunlight or with a UV curing light in just a few minutes. (You can find UV resin here: Lisa Pavelka's Magic Glos available in various sizes).

Using the Magic Glos, I carefully poured the UV resin onto the lid cavity with the rhinestone border holding it in place. I carefully added enough so that it began to mound up into a rounded semi-dome shape. Be very careful not to over fill the area or it will run down the sides of your lid! Its a delicate balance between not too little and not too much...you'll get a good feel for it after you do it, but be slow and careful, Goldilocks!!

I used my nail salon gel-polish drying unit (that I purchased in 1988 and only used twice for nail manicures)...I've kept it all these years...not sure why since my nails are crafter-short...but lookie here, now I am putting it to excellent use!! Using my dryer unit, I cured the jar lid for approx 6-8 minutes and it was hard as glass! You can find hand held UV resin curing tools on Amazon here: UV resin cure light
*Alternate Resin Glaze Options:
If you don't have UV resin, you can also use ICE® resin, which is a regular air-dry resin that can also be used to create "dome" shaped finishes. You can find it in specialty craft stores or here:
Another alternative medium to use to finish the top of the jar is Glossy Accents®. It is an air-dry textured medium that dries clear and hard. It doesn't create a dome shape but creates a very glossy shine and solid protection for your image. *Be careful not to shake the bottle or you will create air bubbles that are difficult to remove! Glossy Accents® is sold in the scrapbooking section of craft stores or you can find it here: Glossy Accents

Voila!
Such a fun and fabulous sparkly treasure to place on your dresser or bedside table to remind you how wonderful you are!!
Let me know what you think!
With Sugarplum Hugs!
Deanne


