
I have a love affair with color and texture. Often times its glass that mesmerizes me. Other times, its fibers...yarn...thread...lace. Add to that, my love of nature, and these Faerie Dream Nests became an idea that is as compelling as it could ever be!
When Spring happened upon me this year, it was in quite a pleasant and abrupt manner that I thoroughly appreciated. The idea of a Faerie Dream Nest popped into my mind like it was carried in on a magical breeze and I couldn't begin the project soon enough.
I have always loved bird's nests in nature...such a perfect creation in their divinely natural state. But I am an artist, and the nests from nature that I have collected to admire, all seem to vanish into dust as the years go by. I felt great inspiration to toss my creativity into the ring, and see what I might add to the concept in an artful way, and something that would last a bit longer!
Having seen crafted nests on Pinterest and Facebook in the past, made of yarn, lace, fabric, wood, wire, foliage, and many other variations, I felt admiration, but none had quite the "wonderment" and "magical splendor" that I was looking for as the PERFECT Faerie Nest. While sitting and digging through my seemingly endless stash of fibers and yarn, I began to see a color palette forming...and the creative vision began to come together.
Since I am an obsessed hoarder of yarn and all craft supplies, it should come as no surprise that I didn't even need to make a trip to the yarn store to supplement my supplies...I had everything I needed to get started. The nest bases that I crocheted using classic crochet thread were perfect in size and structure.
For the sample photographed in this post, though, I actually used a variegated cotton yarn (Peaches & Cream brand, I think?) in shades of green (not that it matters, though, because you really don't see the base unless you take out the nest stuffing). The variegated yarn is slightly thicker then the crochet thread (such as Aunt Lydia's brand), so the nest base ended up being slightly larger than I had intended. No problem though, just more nest to love! But it did end up taking a little longer then I expected to add the fringe to the larger nest. I can see that my predisposition to miniatures (and impatience) will lead me into a mini faerie nest direction! lol.
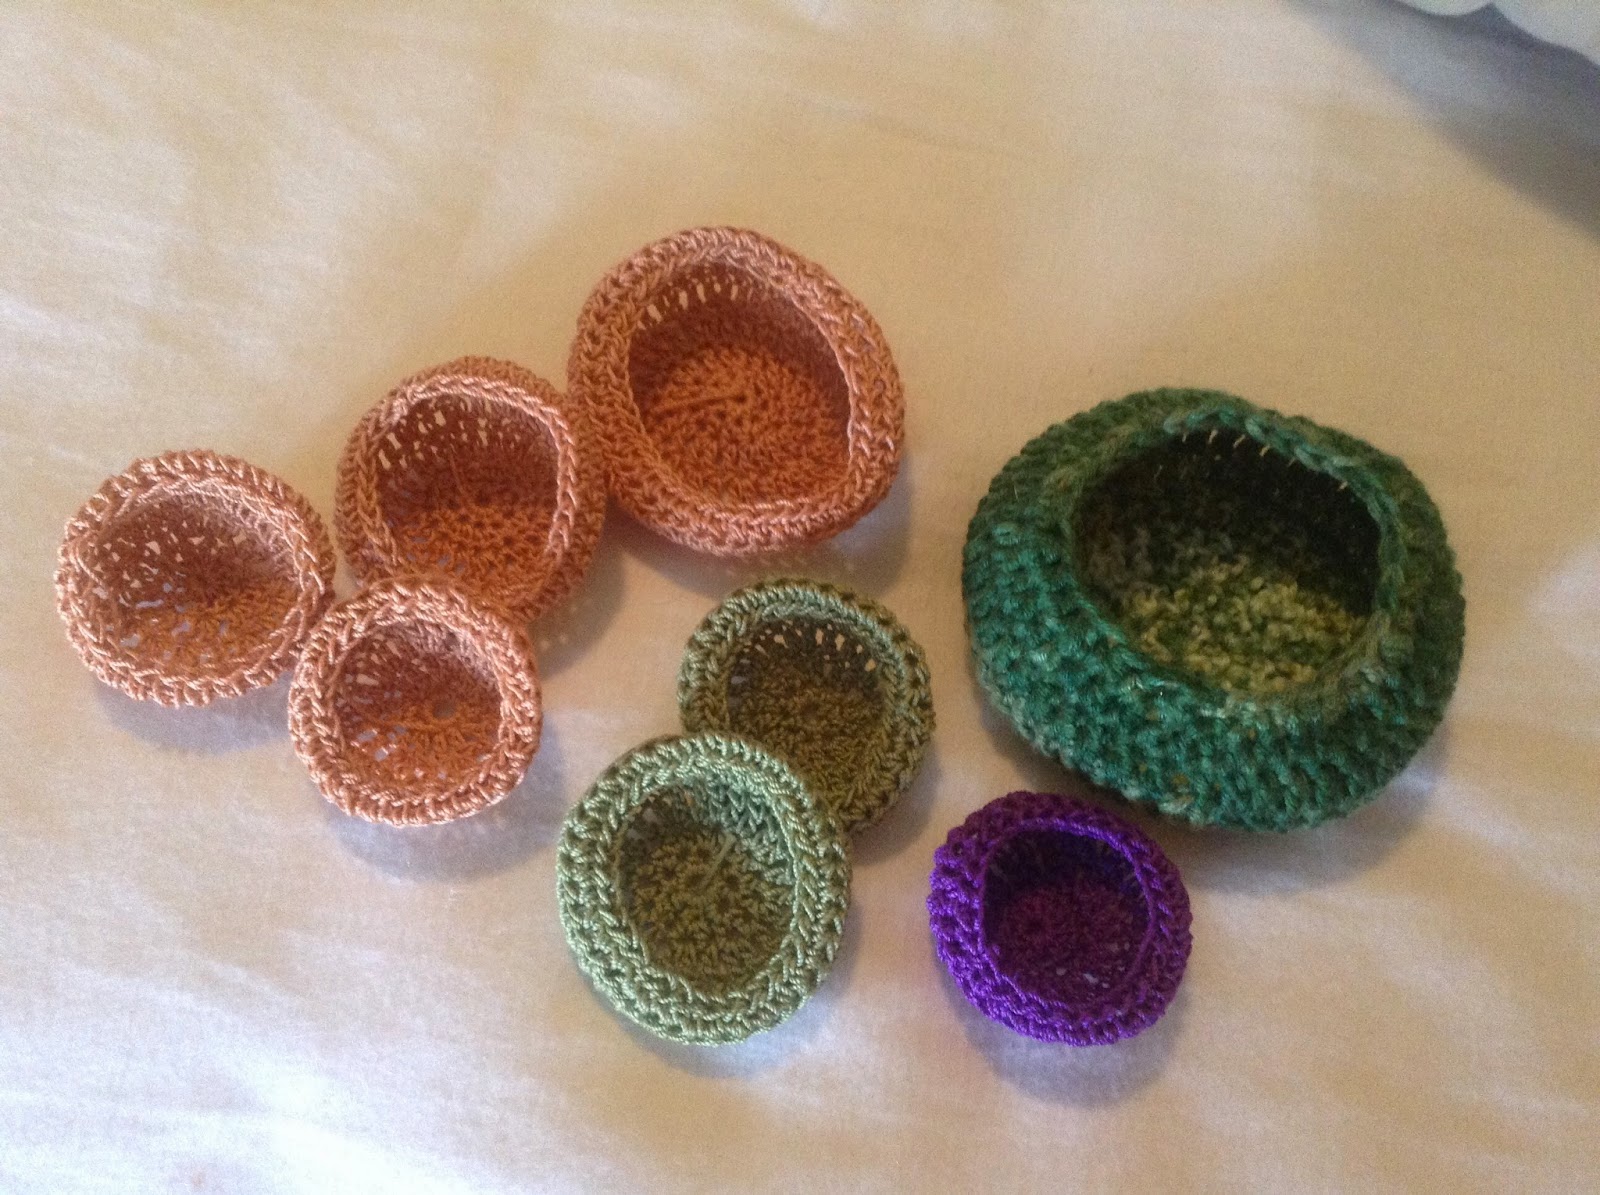
(Here are various nest sizes including the variegated green one used in the sample)

The pattern (see below) I used for the nest base is a simple flat circle worked in rounds, then decreasing stitches into a shape that forms the nest base. The size can easily be increased by adding rows (as described in the pattern) or simply by using a bulky yarn and a larger crochet hook, which will produce a larger finished nest.
For the nest fringe, depending on the size of your nest, you will need to assemble a collection of fibers/yarn/thread that are sized in proportion. For example, you don't want to use thin embroidery floss or thread as fringe for a giant nest because it would not only take you forever to fill in the holes, but it wouldn't be in proportion to look appropriate. And by the same token, you wouldn't want to use thick or bulky yarn for miniature nests (actually you couldn't use bulky yarn for a tiny one because you couldn't get the thick yarn through the tiny stitch holes...).
I used 8-9 various style fibers for my sample nest, in shades of purple, green, copper, and gold w/ rainbow sequins. Each added its own sparkle or fluff or individual characteristics that contributed a unique quality to the nest. (You could certainly make nests of one color and style of yarn, but that would be so...well...boring!)

(a beautiful assortment of yarn, fiber, thread & trim)

(each yarn adds its own unique qualities to the nest)

(metallics add a splash of magic to the nest)

(a half-sheet baking pan makes a great work-tray)
Faerie Dream Nest Crochet Pattern
Crochet hook size D (3.25mm) used in sample
**Various size threads & hooks can be used to create different size nests
Crochet Thread: standard size (24) in various colors for Nest "Base"
Decorative Fibers, Threads, Yarn, etc. for Nest "Fringe"
Nest Base
(Worked in rounds, do not turn)
Ch 4, slst to join into a circle.
Rnd 1:
Ch 2, 2 dc in each st around, slst to close circle (in 2nd ch of beg. of row).
Rnd 2:
Ch 2, 2 dc in next st, *dc, 2 dc in next st, (repeat from * to end of row), slst to close.
Rnd 3:
Ch 2, 2 dc in next st, *dc, dc, 2 dc in next st, (repeat from * to end), slst to close.
(**To make a miniature nest, stop at this point and continue on to Rnd 6)
Rnd 4:
Ch 2, 2 dc in next st, *dc, dc, dc, 2 dc in next st, (repeat from * to end), slst to close.
Rnd 5:
Ch 2, 2 dc in next st, *dc, dc, dc, dc, 2 dc in next st, (repeat from * to end), slst end.
(**To increase size of nest you can add rows beginning at this point. Just add an extra dc in the sequence from above, for each row you choose to add. Then finish with rounds 6-9 to complete base.)
Rnd. 6:
Ch 2, dc in each st around, slst to 2nd ch at beg. of rnd.
Rnd 7:
Ch 2, dc in each st around, slst to 2nd ch at beg. of rnd.
Rnd 8:
Ch 1, hdc in each st around, slst to 1st ch at beg. of rnd.
Rnd 9:
Ch 1, hdc in each st around, slst to 1st ch at beg. of rnd. Finish off. Weave in end.
beg = beginning of row
ch = chain
dc = double crochet
hdc = half double crochet
rnd= round
slst = slipstitch
st = stitch
Nest Fringe:
Using various decorative fibers, threads, yarn, etc, cut pieces approx. 4" long for the all sizes of nests. **For miniature nests, I suggest trimming to a shorter length once the nest is completed, however it is difficult in the crafting stage to tie the fibers onto the base if they are any shorter, so you will still need 4-inch lengths.

(wrap yarn/thread around a cardboard template to cut large amounts of fringe)
I use a sturdy piece of cardboard in the correct size (that I saved from a package insert) approx. 2"x4" (inches). It is just right for wrapping around and then cutting one side while holding the other side securely in your hand; just slide the scissors between the yarn and cardboard and cut along the wrapped edge of cardboard. This is a quick way to create a whole pile of 4" lengths. It is much easier then trying to measure each piece individually, that would take...well...waaaayyyyy too long!
To attach the fringe to the nest, take a piece of decorative yarn (or a collection of pieces if they are very thin threads, etc.) and fold the piece in half to form a loop. Insert the crochet hook into the nest base under and up through the first double crochet in 1st rnd. then grab loop in yarn piece and pull only one of the ends through, then tie a knot to secure in place. Repeat this process all around each row of crochet base using varying pieces of yarn and fibers, until the final row.
For the final row, insert the crochet hook into the top stitch of the row, then pull through the loop but do not pull the end through, instead, wrap ends around hook and pull through the loop; pull snuggly to secure. Repeat this around to finish off top edge.
**For additional Faerie Magic, you can add touches of glitter, sparkling seed beads, or charms to the threads.
To complete the nest, add soft fluffy fibers that have been separated and fluffed to make a soft and comfy bed for you favorite faeries!
copyright 2014 Deanne Crim
Here is a photo progression of the creation process:

(insert hook in between stitch in the 1st row of base)

(take a fringe piece (or grouping of fibers)

(fold fiber in half to form a loop)

(insert hook in between two stitches in 1st row of nest base)

(Pull through one end of fringe and knot to secure fringe to nest base)

(1st row of nest fringe completed)

(my wonderful work tray and my unimpressed crafting companion)

(getting more rows of fringe completed)

(insert hook into one of top edge stitches; then fold fringe piece to make a loop)

(pull loop through partially)

(wrap ends around crochet hook)

(pull fringe ends through loop)

(pull ends snuggly to secure)
Voila!
Now all I need is a magical faerie to inhabit my enchanting "Faerie Dream Nest" and to make all of my dreams come true!! :)
With Sugarplum Hugs,
Deanne
I love it and your tutorial is very easy to follow! <3 Chris
ReplyDeleteThanks Chris!! I hope you'll show pics if you have a chance to make one!! :) <3
Delete